Sunday, 18 March 2012

Tidying up the dash a bit

While browsing Ebay recently, I managed to score a cheap oil pressure gauge. This is something I've felt I should fit for a while, as it would be nice to have early warning of low oil pressure, should something go wrong. Unfortunately, there was no space on my dash for it. I wasn't particularly happy with the way the traction control just sort of hung awkwardly off the bottom of the scuttle so figured I'd make a little centre console bit.
Traction control hanging a bit shoddily off the bottom of the scuttle.

After a lot of fiddling around, I ended up with this. It's not perfect (slightly too wide at the bottom) but it's a big improvement.

Oil pressure gauge mounted.

When the sender adapter arrives I'll plumb it into the engine.

Meanwhile, I've also been dismantling the VANOS. The idle is a little bit rough, and I can't find any intake or exhaust leaks to explain this. So I tried unplugging the VANOS while it was idling, and noticed no change in the engine note at all (the VANOS should be adjusting the timing at idle, so normally unplugging it would make the idle get quite a bit rougher), which suggests that it's not doing anything.

Vanos solenoid.


The VANOS seals look OK-ish, and the solenoids all have about the right resistance, and click when I apply 12v to them, so it's not totally clear if they're working or not. I've ordered a replacement set of seals anyway and will see if that makes a difference.

Sunday, 11 March 2012

MOT... passed?

After the MOT failure I took the car to a garage and asked them to take a look at the emissions, on the grounds that they have tools for analysing the exhaust gas so they'll be better able to tell what affects emissions. This sort of worked. They found that by unplugging the MAF, the car will run on a more basic fuelling map that's good enough to get through MOT. So I now have an MOT but still don't really know what's wrong with the car (although it does at least rule out things like excess fuel pressure, or poorly seating valves, etc, and point towards a problem with running closed loop). Given that they haven't actually done anything to the car or identified the issue, this feels very close to a bribe, but an MOT pass is a pass, so I'm not complaining.

More fiddling about on the intake side this time revealed a perished hose leading to the EGR valve (which I'm not using), so I removed this and blocked it off properly in case it was causing an intake leak. I'm not sure this has helped, though I may go back and get them to check the emissions again.

They also pointed out that the wheel alignment was very poor, no big surprise as I haven't done the front end since replacing the wishbones. Perhaps a job for this afternoon.

Wednesday, 29 February 2012

Progress?

I took the car for an MOT on Friday, but it failed due to emissions (not a total shock, but still disappointing), and headlight position. Apparently one headlight is a few mm lower than the other, which is No Good, despite passing IVA and the last MOT. Easily fixed with a spacer though. Emissions are more tricky.

Emissions are all good, except for lambda (air/fuel ratio) which was 1.2, i.e. pretty far off (20% too much oxygen present, though I suspect 1.2 was the limit of the analyser they were using and in fact it was even worse than this). In a perfect world the oxygen and fuel would balance in exactly the right ratio and all the oxygen would be used up burning the fuel to produce CO2.

In my world, however, the prime suspect is an exhaust leak upstream of the lambda sensors, which would explain (a) the excess oxygen as the exhaust flow draws in more air and (b) the rubbish fuel economy as the lambdas detect the oxygen and compensate with extra fuel. Presumably the cat is then using the excess oxygen to burn the excess fuel and hence I'm seeing normal HC (unburned fuel) levels at the tailpipe, which will be rapidly destroying the cat.

After looking for an exhaust leak and not finding one, I took the exhaust apart in search of more evidence, and eventually found this where the primaries join the block:

Exhaust gaskets. Note scorch marks at top left.

Which looks like pretty solid evidence of a leak. I've ordered new gaskets (these are off the old 328 engine and are slightly different to the M3 gaskets, which can't help), and booked a retest. They said they'd "make sure it passes" next time, which is nice of them, but I'd quite like to actually fix the problem.

Saturday, 18 February 2012

Lack of progress

Not a lot to say this time round: the front suspension is, finally, all back together, tightened, etc and ready to go. Thanks to Ben for coming round to help me bleed the brakes.

Unfortunately the car's due an MOT so no road testing until that's done... and given the weather at the moment, that hasn't happened this weekend. It will have to wait for a dry day. In the mean time, the windscreen is off (it would fail due to the lack of wipers), and the centre mirror and front numberplate are on in readiness for the MOT. Given that I always tend to drive in a helmet anyway, I'm debating leaving the windscreen off. Might see how that one goes.

In the meantime I got on with some garage upgrades: the garage now features 1700 W of lighting, which also contributes significantly to making it warmer, and may help stop me hitting my fingers with a hammer so often.

And the search for decent wheels continues. The main problem seems to be that BMW owners tend to go for big (heavy) wheels - even on race cars, no one uses 15" because they're all running big brake kits. So finding some lightweight 15" wheels is proving difficult. Team Dynamics seem to be about the only option at the moment, which is not very exciting (or especially lightweight). Keeping my eyes open for some Dymags but not holding my breath as these seem kind of rare.

Monday, 23 January 2012

Steering upgrade (part 1)

One problem the car has had is that is suffers from a lack of steering lock (because the front wheels hit the bodywork). A dollop of right foot is sufficient to get the car round tight country lanes, but going up a multi-storey car pack requires three point turns at the top and bottom of each ramp, which is irritating at best. So something had to be done.

Fortunately Peter had already realised this was an issue and produced some new, longer front wishbones to move the wheels an extra inch out from the body each side, and so I get to test out the new design. Along with the new wishbones come longer brake hoses, steering rack extensions, and, more controversially, brackets to lower the top shock mount.

Lowering the top shock mount is not something I was originally keen on as it will make the springs slightly closer to horizontal, but it's needed because otherwise the shock will contact the chassis now that the bottom mount has moved out. However, some messing around in Excel shows that they will remain rising rate, and the only real difference is that they'll be effectively about 10% softer, which could easily be sorted with some new springs if I'm able to detect a difference.

So far I've tried three sets of springs at the front (350 lb, as orginally supplied, 650 lb, as recommended by Jason - much too stiff for my liking - and some dual rate springs which were a bit of a punt as they were cheap on Ebay, but these turned out to be unsuitable as the soft bit was fully compressed statically, which wasn't what I was after - so I'm back with 350 at the moment). So messing with springs is par for the course at the moment anyway.

Peter supplied a couple of lowering brackets, but I wasn't really happy with them:

The original bracket. Shock goes in the left hand end, right hand mounts in original top mount location.

Unmodified bracket in place (original top mount is hidden on the other side of the chassis plate). This is only stopped from rocking in/out by edge-to-edge contact between the bracket and the chassis plate it passes through, i.e. on a non-flat area about 6^2 mm

They seem subject to (a) skewing and a general lack of robustness, and (b) rocking back and forth (i.e., pivoting at the original top mount location). After some discussion with Will & others, I decided on welding the crush tube into place, and welding a plate along one edge to prevent skewing, with a second plate coming out at right angles which could bolt onto the chassis, thus ensuring that it couldn't swing around. The second plate remains slightly spaced away from the chassis so the loads are still taken in the original place. A bit of tinkering around and I tacked up this (note: the non-flushness of the L-shaped piece is intentional, to get the right fit against the panel it bolts onto):

Modified bracket tack-welded together. The welds would be better if I hadn't run out of gas. Really.

And Will then welded it properly for me, and with a bit of Hammerite applied it now looks like this:

Modified bracket.

Carrying on, I got most of the other bits done: I made up the connections on the new brake hoses, pressed in the new wishbone bushes, and wedged the new wishbones into their mounts (several hours of cursing and "tapping gently" with my biggest hammer as they're a very tight fit). I also took the steering rack apart and removed the springs which were acting to limit the amount of movement in the rack. Hopefully the longer wishbones will accommodate the full range of motion of the rack - Peter reckons this should be the case; if not then I'll make up some shorter collars, or cut down the springs.

At this point the car is just about ready to put the uprights back on, and then redo the front ride height, camber and toe setup. To be continued as soon as my new nuts and bolts arrive.

Sunday, 18 December 2011

Four month update

Despite the lack of updates, work has continued on the car. In rough order:

Brakes
Firstly, and after a lot of trial and error, I fixed the braking problem (the rears were locking up first, which usually led to the back stepping out, and on one occasion to a 180ยบ spin). Sadly I didn't discover the cause until after replacing:

  • Rear callipers
  • Front callipers
  • All brake fluid
  • Pads all round
along with fiddling with the pedal arrangement. Thanks to Peter for spending his Saturday helping me with fiddling with all of the above - even if we didn't solve it, it was useful to double check all these things. A bias bar helped work around the problem, but it clearly wasn't solving the underlying issue, which I later discovered was the union on the front circuit where the pressure switch for the brake lights screws in - this was leaking very very slightly, causing a lack of pressure to the front. Tightening that up solved the problem: simple but a huge improvement.

Oil
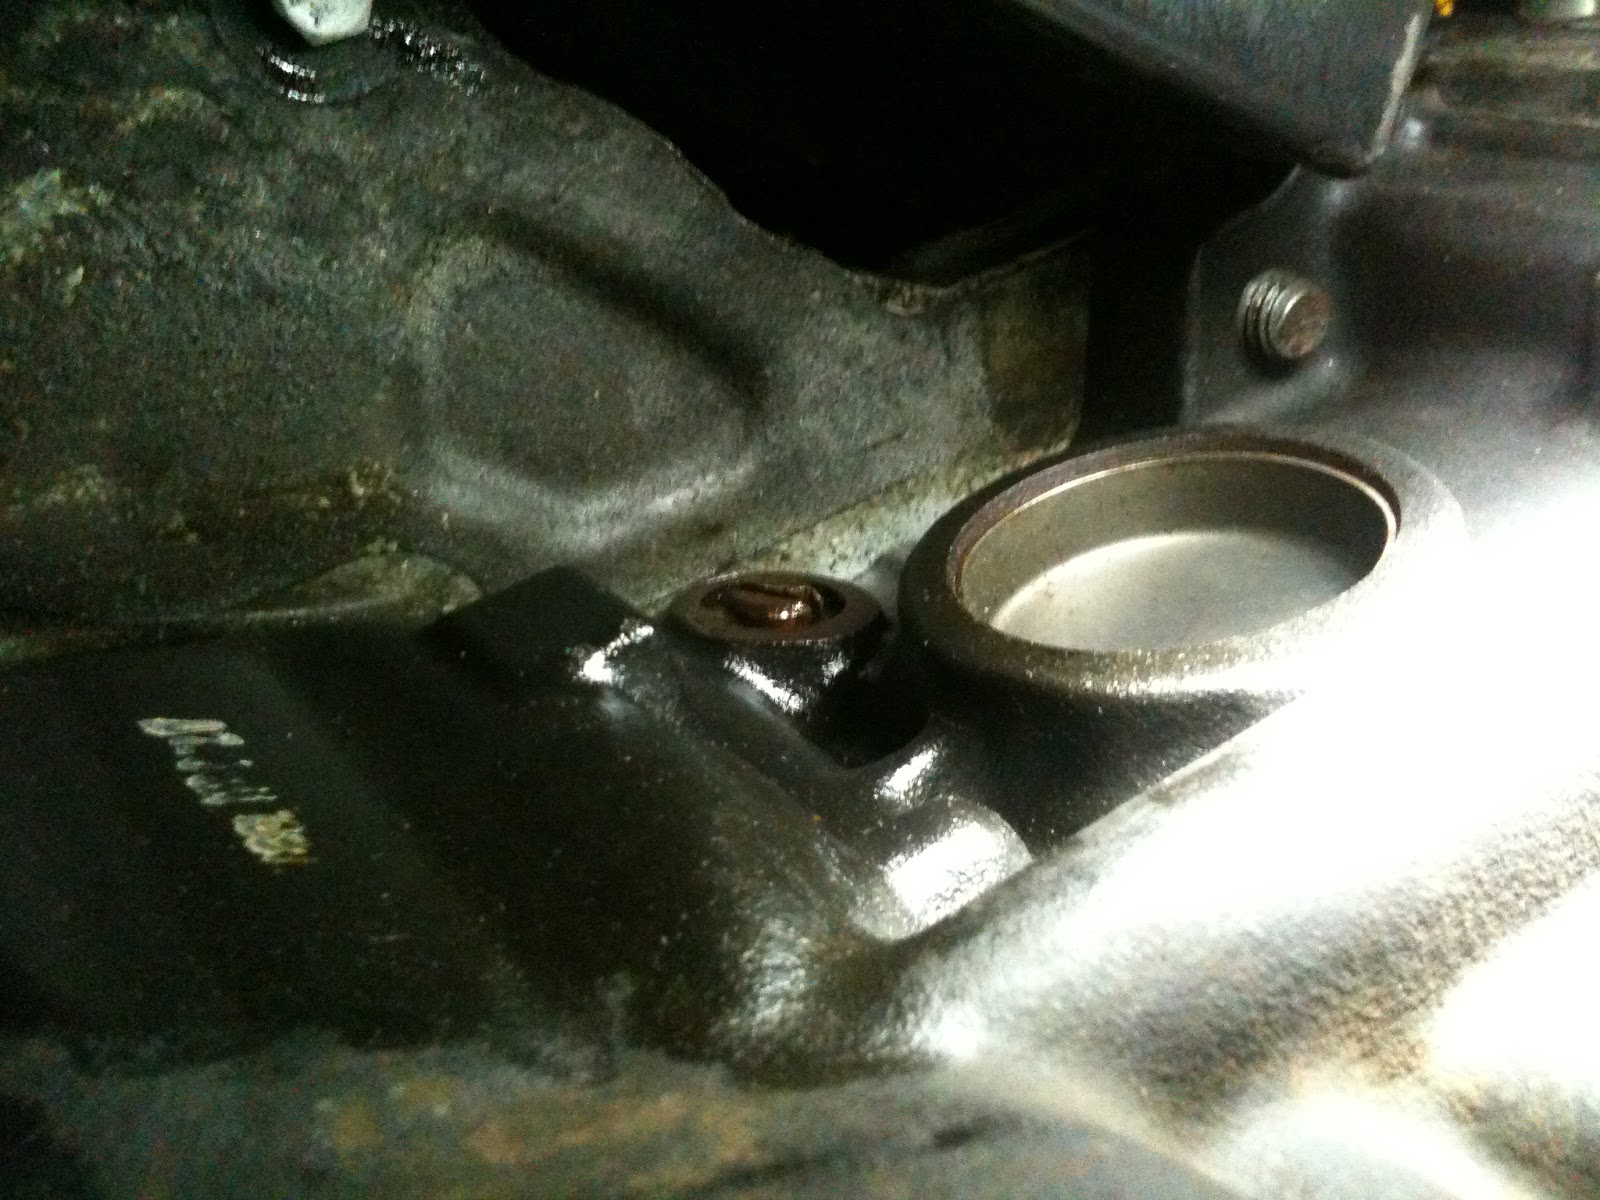
This one is still only 90% fixed, but that's probably good enough. There was a small but significant leak, which turned out to be from a little valve on the side of the block (a pressure regulator), where an O-ring had perished. Fortunately I had a suitable sized O-ring kicking about the garage, so, apart from the difficulty of accessing this with the engine in the car, this was a pretty easy fix.

The offending oil pressure valve.

Unfortunately there seems to still be a tiny leak from the sump (which I removed to sort out the oil pump after fitting the engine). It's probably not big enough for me to want to remove the sump again to fit a new gasket (really wish I'd fitted a new gasket first time round) though, so I will just keep an eye on it.

Setup
Thanks to Jason for lending me his wheel alignment kit. Having got all the wheels pointing the right direction, the car feels a lot more stable and controlled. Toe-out at the rear has been changed to toe-in, which has made the handling safer, if less entertaining.

I've also experimented with a couple of different sets of springs, but so far am sticking with the original set at 350 front and 180 rear. These are a touch on the soft side, leading to an amount of body roll, but grip and ride are good so I think I'll probably track the car like this and see how it handles on track.

Jason has also passed on a longer set of wishbones for the front, which will give me more steering lock, which is badly needed, not so much for driving around where there is just about enough lock, but more for parking and manoeuvring. These are yet to be fitted (I'll need to get some longer tie-rods to match), but this should keep me busy in the New Year.

Cycle Wings
Once again, the brackets holding these on broke, this time at a very inconvenient place (on a dual carriage way slip road in rush hour, with no hard shoulder). Not fun at all.

Peter has provided new brackets, and I've experimented a little with how I'm attaching the new wings as I want to keep them detachable, but don't want exposed bolts on the top side. I've bonded them to a bracket with studs pointing down, and then bolted the studs to the main cycle wing bracket. Hopefully the sikaflex is strong enough to keep them attached (and hopefully I've welded the studs on strongly).

New cycle wing with bracket and tube for wiring bonded on.

Main bracket ready for cycle wing.

Fuel Economy
As always, this remains a tricky problem. I saw some improvements when I removed the exhaust, and remounted it at a more natural angle. Previously the supplied brackets meant that the tubes were at a slight angle where they pushed into each other, creating a space where oxygen could be drawn in upstream of the lambda sensors (which, on detecting unused oxygen, would cause the ECU to compensate with extra fuel). A combination of new brackets and replacing the gun-gum exhaust paste I'd previously used with RTV sealant seemed to improve matters, getting fuel economy briefly up to the low thirties... but then it dropped back to low twenties again.
I've since discovered the port on the side of the engine where clean air is injected into the exhaust to improve emissions, which I had blocked off, had maybe not been as well blocked as I thought, which could be a potential source of oxygen getting into the exhaust. I've since fitted the BMW part for blocking this off (turns out the South African market doesn't care about emissions, so they make a suitable part for them), which may or may not improve things.

Other
When setting out for one test drive, I heard a scary sounding grinding noise (it can be heard in the first few seconds of this video):

Not a sick engine. At least, not as far as I know...

Fortunately, this didn't mean my engine was dead - it turned out just to be the water pump bearing failing. Removing the aux belt it was very clearly starting to seize up, so I got a new pump fitted and problem solved. I didn't replace the gasket as it was firmly stuck to the block and I was afraid of scratching the block and ruining the seal forever - this turned out the be the right choice as it didn't leak. I suspect that the tensioner may be on the way out too, but it's not making any funny noises so it will do for now.

I also finally got round to putting a hinge on the front nosecone so that I can easily access the radiator. Another job I wish I'd done ages ago - improving access always seems to be worth investing time in, something I could have benefitted from realising at the start.

So this leaves the car with working brakes, not overly leaking, and with all the wheels aligned and cycle wings fitted... could this be the long hoped for point after which it's all just fine tuning?

Thursday, 18 August 2011

More photos

Some photos from Sunday, when I drove to a BMW show up in Gaydon to exhibit the car on the GKD stand. The car went down surprisingly well with the BMW crowd - I'd expected people who are into fast big saloon cars not to be that into a 7 style car, but most people liked it and a few seemed reasonably interested in building one, so a day well spent.

The car performed well on the way there and back, but fuel consumption was, predictably, awful. Peter is sending me some new rear calipers as we suspect the problem may lie with broken calipers, so fingers crossed that will sort it.