Sunday, 30 September 2012

Fin

I finally got round to replacing the tatty old BMW wheels with some shiny forged magnesium wheels. They weigh less than 5 kg per wheel and look super. Unfortunately, they're not BMW fitment, so I have to use an adaptor which pushes the wheel out by an additional 35 mm and adds about 1 kg / corner back on - but the weight saving is still around 3 kg per corner which is well worth having. New brackets for the cycle wings will be needed at the front to keep the cycle wings central over the wheels - at the moment the wheels stick out quite a bit which looks a bit silly.

Last Saturday I managed another track outing, happily with no engine or other failures, bringing the failure-rate down to one engine per track day. Hopefully I can take that as a sign that engine #3 is a good 'un.


Waiting for the green light. Note appropriate race number.

The track outing took the form of a sprint - a very tight twisty track, doing timed runs against the clock, one car at a time.


Engine not exploding. Result.
Note cycle wings not centred over front wheels.

The car performed very well, although it became clear that the springs were a bit on the soft side. The extra track width doesn't help as this means the wheels have more leverage to compress the springs. So after a bit of educated guesswork, I had a guess at a new spring rate for the front and stuck some stiffer springs on, which has greatly improved things. The dampers can be wound back a bit as they're no longer needed to try and stiffen the ride, so they are able to control the springs better which gives a less chattery ride. Having stiffer springs at the front has also improved the front-back grip balance so the car can now be made to understeer, rather than going straight to oversteer when feeding in the power. Less entertaining but probably faster. Turn-in feels a bit sharper which is an improvement.

However, this has highlighted the fact that the rears are now more than a bit soft... so they are next on the list. Turn-in at the moment is a bit of a two-stage process - the front turns in quite neatly, and then shortly afterwards the back settles itself into position with a general lack of urgency. As a starting point I may try putting the old front springs on the back and see how that feels.

I suspect an ARB at the front will improve matters further, perhaps a winter project for after the rear spring rates are sorted.

Simon having a go. Despite being used to very forgiving 4wd rally cars, he very kindly neither crashed nor humiliated me on time (he was slower in the morning, quicker in the afternoon).
Note excessive body roll on the old springs.

Now that my major concerns with the car are worrying about suspension setup and adjusting spring rates, it seems that mechanical reliability and basic build stuff is more or less there. Not that there isn't lots I want to do still (front anti-roll bar, make a nicer looking dash, redo some untidy bits of vinyl wrap, data logger, etc, etc), but this is all nice-to-have stuff.

So this is probably a good point to put the build blog to bed. It's been a good experience. Lots of things I'd do differently next time, but that's to be expected really. Looking forward to lots more track days in it, and fewer exploding engines.

Saturday, 14 July 2012

Spinning at Blyton

On further inspection the first main bearing from engine #2 that I looked at (adjacent to the failed big end if I remember rightly) turned out to be ruined. This means that it would be crank out to fix, which would make a regrind a no-brainer, plus big-end and main shells, full strip and engine flush, etc. Doing the sums suggested that I could very easily spend £1k or more fixing a £1500 engine, or replace it and sell some of the bits to make up the difference. The latter seemed like an easier, more reliable and more cost effective option, so that's the route I took.

Main bearing from engine #2.

Eventually I found an engine via Ebay, and the seller offered to knock £150 off if I bought it without going through Ebay to avoid fees... and Ebay buyer protection. Obviously I said yes and took the risk, on the grounds that I have no faith at all in Ebay's buyer protection scheme. The engine showed up promptly, although it was pretty clear that the seller's claims of driving the engine for a few months were lies - since several of the intake hoses were completely perished, I doubt it would have run at all. It was also covered in oil from various leaks. This was a bit more lying than I had anticipated from the seller (I'd expected a bit), but still, none of this is very serious, so I got it on a stand and cracked it open.

"Yeah mate, it runs really smoothly"

"No oil leaks, breaks my heart to sell it, really does"

Happily, I found more or less what I expected when I looked at the big ends - a considerable amount of normal wear on the bearings, but no sign of serious problems and (almost) no crank marks. Similarly, the mains were basically perfect (they take much less load so this is to be expected).

The only exception was big-end #1 which had a slight scratch on the crank. I umed and ahed for a while on this one but eventually decided that since the scratch was barely detectable with a fingernail, and ran straight down the centre of the bearing, there was no path for the oil to escape without building pressure and floating the crank as it's supposed to, and that it ought to really be harmless. Time will tell I suppose, but certainly there was no evidence of knocking or anything like that - the oil that came out was black but free of debris, and the corresponding bearing was worn but not excessively, and not more than any of the others. So my reading is that this has been there for a while without causing a problem.

I plastigauged a few bearings and found them to be bang in the middle of spec, which was reassuring. So I put it back together with new big-end bearings (I'd have to remove the crank to do the mains and I didn't really see the point as these looked fine and never go wrong anyway) and stronger-than-standard ARP big-end bolts (most expensive bolts I've ever bought at £8 a bolt with a total of 12 bolts).

Slightly scratched big-end.

Mains look fine.

Big end cap - no serious wear. Fractured rods, very fancy. Grass needs a cut though.

Engine on stand and crane, just in case. Good thing actually as I didn't put the stand together properly - it didn't fail but it easily could have.

Engine on stand.

Another big end bearing looking fine.


So without further ado I put it back together with new big-end bearings and main and big-end bolts and stuck it in the car, although not without replacing the flywheel with a lightened single-mass flywheel (more on this in a bit), on the grounds that if I'm going to all the effort of replacing the engine, I should at least try to improve it in some way (in addition to making it work). The flywheel was a pain in itself - I was told that standard bolts would be fine, but they turned out to be much too long for the thinner flywheel. E30 bolts didn't work as they were too short (they engaged about three threads, which I felt was a bit marginal). So in the end I bought some new E36 bolts and got them cut down by the difference in thickness, which I'm sure will do the job.

On first start I was greeted by... an awful clanking noise. I considered phoning a scrap dealer and getting them to take the car away forever but after a couple of hours of investigation and research, finally identified the cause: the engine was sat slightly differently and was touching the chassis. I got the hacksaw out and removed the offending part, and all was well. It built oil pressure without much issue, thanks to packing the pump with vaseline (there was a slight issue as the pickup pipe is held by a bracket on one of the main cap screws - when I put the main cap back the bracket moved slightly, which meant that I struggled to get the pipe right. Next time I'll put the caps on with the pump in place).

Over the next few weeks I gave it some test runs, gently building up to max revs and changing the oil a few times. Each time nothing very bad came out, and no nasty surprises occurred. However, I do regret not changing the clutch - the standard M3 clutch is unsprung, because the dual-mass flywheel absorbs vibrations. My single-mass lightened flywheel doesn't do this, so using it with a standard clutch is, I think, a mistake. At some point I need to take the engine out and replace the clutch with a sprung clutch from an M5. It's quite a lot of effort though so I'm ignoring it for now; perhaps a job for the winter.

Last weekend it got it's second track outing, this time at Blyton Park. It performed well up until lunchtime, when the heavens opened and didn't stop until the evening. I took it out anyway in the afternoon, but I can't honestly say it was particularly enjoyable, especially when the front brakes stopped working. I've since replaced the front master cylinder and will see how that goes tomorrow. Despite the missing front brakes, however, I only managed one spin in the wet, narrowly avoiding a haybale and emerging unscathed.

For once, the breakdown on the way home wasn't me (Ben's rear brake calliper fell off the Atom). A relatively painless track outing then, if spoiled a bit by the rain. Current tally: 1.5 engines per track day.

Tuesday, 24 April 2012

Spinning at Bedford

A few weeks ago I took the 7 out to Bedford to see how it performed on the track. Preparation consisted of borrowing Ben's garage (thanks Ben) to try and get the suspension set up reasonably accurately - I think I did an OK job, but regret not corner-weighting it - maybe a job for the future, or maybe for a professional. I'm not sure how accurately I'd be able to do that at home.

I'm happy to say that performance was excellent. Cornering grip, even on cheapish T1Rs, was very good - I was surprised at how much better it was through the corners than many of the other cars there. Straight line speed was no real surprise - it was excellent, obviously, and even on the main straight (and through the corners, when I got the lines right) it proved able to stay with a Porsche GT3 RS, which isn't bad for something I bodged together in my garage. Top marks to the GKD design there. Braking was strong, but under very heavy braking it seemed to lock the front left much sooner than the front right (and then veer quite hard to the right) which I'm attributing to the lack of corner-weighting. Steering was on the heavy side; I suppose the weight of the big engine doesn't help here. I guess it'll be an on going task to try and figure out a way to improve that, maybe using rose joints instead of ball joints up front, perhaps a change of steering rack? I think less rear toe might improve turn in, but there's a balance to be struck there with cornering stability. Overall I'm really impressed with how it performed and look forward to seeing how performance improves with a corner-weighting, and perhaps better tyres.

Unfortunately there were two spins. The first was harmless, due to an ill-judged mid-corner gear change that unsettled the car and left me looking backwards down the track at a Boxster bearing down on me at 70 mph; the second wasn't so good.

The second spin looks more expensive. The first sign was a knocking noise...

Expensive noise.

Unfortunately at the time I attributed this to a loose exhaust silencer and carried on, but realised at the end of the day that it was coming from the engine. Further investigation and sump removal revealed that it had spun a big-end shell:
The spun bearing (number 6).


The spun bearing dissolved itself in the oil.


And left some parts of itself attached to the crank.

 The hope is that the crank will clean up in-situ, and then a fresh set of big-end bearings and a few oil changes should get it back to full health fairly quickly and cheaply. If the crank damage proves more extensive then it's engine out to remove the crank for a regrind, at which point the time and money cost will start to stack up...

Whilst investigating I also discovered that the idiot who previously worked on the engine has shimmed the intake valves to the same spec as the exhaust valves, so this will need fixing too. Not a massive or expensive job, but irritating nonetheless.

Hopefully the car will be back on the road soon - it really depends on what I find as I inspect the crank.

I would recommend other builders using the BMW straight 6 to refresh their big-end bearings and use upgraded (ARP) bolts. Apparently the big-end bearings are a known weakness in these engines, especially when driven hard as they will be in these cars. If done preventatively it should only be a few hours and around £150... if done after spinning a shell it could be a lot more if a crank regrind is required.

Sunday, 18 March 2012

Tidying up the dash a bit

While browsing Ebay recently, I managed to score a cheap oil pressure gauge. This is something I've felt I should fit for a while, as it would be nice to have early warning of low oil pressure, should something go wrong. Unfortunately, there was no space on my dash for it. I wasn't particularly happy with the way the traction control just sort of hung awkwardly off the bottom of the scuttle so figured I'd make a little centre console bit.
Traction control hanging a bit shoddily off the bottom of the scuttle.

After a lot of fiddling around, I ended up with this. It's not perfect (slightly too wide at the bottom) but it's a big improvement.

Oil pressure gauge mounted.

When the sender adapter arrives I'll plumb it into the engine.

Meanwhile, I've also been dismantling the VANOS. The idle is a little bit rough, and I can't find any intake or exhaust leaks to explain this. So I tried unplugging the VANOS while it was idling, and noticed no change in the engine note at all (the VANOS should be adjusting the timing at idle, so normally unplugging it would make the idle get quite a bit rougher), which suggests that it's not doing anything.

Vanos solenoid.


The VANOS seals look OK-ish, and the solenoids all have about the right resistance, and click when I apply 12v to them, so it's not totally clear if they're working or not. I've ordered a replacement set of seals anyway and will see if that makes a difference.

Sunday, 11 March 2012

MOT... passed?

After the MOT failure I took the car to a garage and asked them to take a look at the emissions, on the grounds that they have tools for analysing the exhaust gas so they'll be better able to tell what affects emissions. This sort of worked. They found that by unplugging the MAF, the car will run on a more basic fuelling map that's good enough to get through MOT. So I now have an MOT but still don't really know what's wrong with the car (although it does at least rule out things like excess fuel pressure, or poorly seating valves, etc, and point towards a problem with running closed loop). Given that they haven't actually done anything to the car or identified the issue, this feels very close to a bribe, but an MOT pass is a pass, so I'm not complaining.

More fiddling about on the intake side this time revealed a perished hose leading to the EGR valve (which I'm not using), so I removed this and blocked it off properly in case it was causing an intake leak. I'm not sure this has helped, though I may go back and get them to check the emissions again.

They also pointed out that the wheel alignment was very poor, no big surprise as I haven't done the front end since replacing the wishbones. Perhaps a job for this afternoon.

Wednesday, 29 February 2012

Progress?

I took the car for an MOT on Friday, but it failed due to emissions (not a total shock, but still disappointing), and headlight position. Apparently one headlight is a few mm lower than the other, which is No Good, despite passing IVA and the last MOT. Easily fixed with a spacer though. Emissions are more tricky.

Emissions are all good, except for lambda (air/fuel ratio) which was 1.2, i.e. pretty far off (20% too much oxygen present, though I suspect 1.2 was the limit of the analyser they were using and in fact it was even worse than this). In a perfect world the oxygen and fuel would balance in exactly the right ratio and all the oxygen would be used up burning the fuel to produce CO2.

In my world, however, the prime suspect is an exhaust leak upstream of the lambda sensors, which would explain (a) the excess oxygen as the exhaust flow draws in more air and (b) the rubbish fuel economy as the lambdas detect the oxygen and compensate with extra fuel. Presumably the cat is then using the excess oxygen to burn the excess fuel and hence I'm seeing normal HC (unburned fuel) levels at the tailpipe, which will be rapidly destroying the cat.

After looking for an exhaust leak and not finding one, I took the exhaust apart in search of more evidence, and eventually found this where the primaries join the block:

Exhaust gaskets. Note scorch marks at top left.

Which looks like pretty solid evidence of a leak. I've ordered new gaskets (these are off the old 328 engine and are slightly different to the M3 gaskets, which can't help), and booked a retest. They said they'd "make sure it passes" next time, which is nice of them, but I'd quite like to actually fix the problem.

Saturday, 18 February 2012

Lack of progress

Not a lot to say this time round: the front suspension is, finally, all back together, tightened, etc and ready to go. Thanks to Ben for coming round to help me bleed the brakes.

Unfortunately the car's due an MOT so no road testing until that's done... and given the weather at the moment, that hasn't happened this weekend. It will have to wait for a dry day. In the mean time, the windscreen is off (it would fail due to the lack of wipers), and the centre mirror and front numberplate are on in readiness for the MOT. Given that I always tend to drive in a helmet anyway, I'm debating leaving the windscreen off. Might see how that one goes.

In the meantime I got on with some garage upgrades: the garage now features 1700 W of lighting, which also contributes significantly to making it warmer, and may help stop me hitting my fingers with a hammer so often.

And the search for decent wheels continues. The main problem seems to be that BMW owners tend to go for big (heavy) wheels - even on race cars, no one uses 15" because they're all running big brake kits. So finding some lightweight 15" wheels is proving difficult. Team Dynamics seem to be about the only option at the moment, which is not very exciting (or especially lightweight). Keeping my eyes open for some Dymags but not holding my breath as these seem kind of rare.

Monday, 23 January 2012

Steering upgrade (part 1)

One problem the car has had is that is suffers from a lack of steering lock (because the front wheels hit the bodywork). A dollop of right foot is sufficient to get the car round tight country lanes, but going up a multi-storey car pack requires three point turns at the top and bottom of each ramp, which is irritating at best. So something had to be done.

Fortunately Peter had already realised this was an issue and produced some new, longer front wishbones to move the wheels an extra inch out from the body each side, and so I get to test out the new design. Along with the new wishbones come longer brake hoses, steering rack extensions, and, more controversially, brackets to lower the top shock mount.

Lowering the top shock mount is not something I was originally keen on as it will make the springs slightly closer to horizontal, but it's needed because otherwise the shock will contact the chassis now that the bottom mount has moved out. However, some messing around in Excel shows that they will remain rising rate, and the only real difference is that they'll be effectively about 10% softer, which could easily be sorted with some new springs if I'm able to detect a difference.

So far I've tried three sets of springs at the front (350 lb, as orginally supplied, 650 lb, as recommended by Jason - much too stiff for my liking - and some dual rate springs which were a bit of a punt as they were cheap on Ebay, but these turned out to be unsuitable as the soft bit was fully compressed statically, which wasn't what I was after - so I'm back with 350 at the moment). So messing with springs is par for the course at the moment anyway.

Peter supplied a couple of lowering brackets, but I wasn't really happy with them:

The original bracket. Shock goes in the left hand end, right hand mounts in original top mount location.

Unmodified bracket in place (original top mount is hidden on the other side of the chassis plate). This is only stopped from rocking in/out by edge-to-edge contact between the bracket and the chassis plate it passes through, i.e. on a non-flat area about 6^2 mm

They seem subject to (a) skewing and a general lack of robustness, and (b) rocking back and forth (i.e., pivoting at the original top mount location). After some discussion with Will & others, I decided on welding the crush tube into place, and welding a plate along one edge to prevent skewing, with a second plate coming out at right angles which could bolt onto the chassis, thus ensuring that it couldn't swing around. The second plate remains slightly spaced away from the chassis so the loads are still taken in the original place. A bit of tinkering around and I tacked up this (note: the non-flushness of the L-shaped piece is intentional, to get the right fit against the panel it bolts onto):

Modified bracket tack-welded together. The welds would be better if I hadn't run out of gas. Really.

And Will then welded it properly for me, and with a bit of Hammerite applied it now looks like this:

Modified bracket.

Carrying on, I got most of the other bits done: I made up the connections on the new brake hoses, pressed in the new wishbone bushes, and wedged the new wishbones into their mounts (several hours of cursing and "tapping gently" with my biggest hammer as they're a very tight fit). I also took the steering rack apart and removed the springs which were acting to limit the amount of movement in the rack. Hopefully the longer wishbones will accommodate the full range of motion of the rack - Peter reckons this should be the case; if not then I'll make up some shorter collars, or cut down the springs.

At this point the car is just about ready to put the uprights back on, and then redo the front ride height, camber and toe setup. To be continued as soon as my new nuts and bolts arrive.

Sunday, 18 December 2011

Four month update

Despite the lack of updates, work has continued on the car. In rough order:

Brakes
Firstly, and after a lot of trial and error, I fixed the braking problem (the rears were locking up first, which usually led to the back stepping out, and on one occasion to a 180º spin). Sadly I didn't discover the cause until after replacing:

  • Rear callipers
  • Front callipers
  • All brake fluid
  • Pads all round
along with fiddling with the pedal arrangement. Thanks to Peter for spending his Saturday helping me with fiddling with all of the above - even if we didn't solve it, it was useful to double check all these things. A bias bar helped work around the problem, but it clearly wasn't solving the underlying issue, which I later discovered was the union on the front circuit where the pressure switch for the brake lights screws in - this was leaking very very slightly, causing a lack of pressure to the front. Tightening that up solved the problem: simple but a huge improvement.

Oil
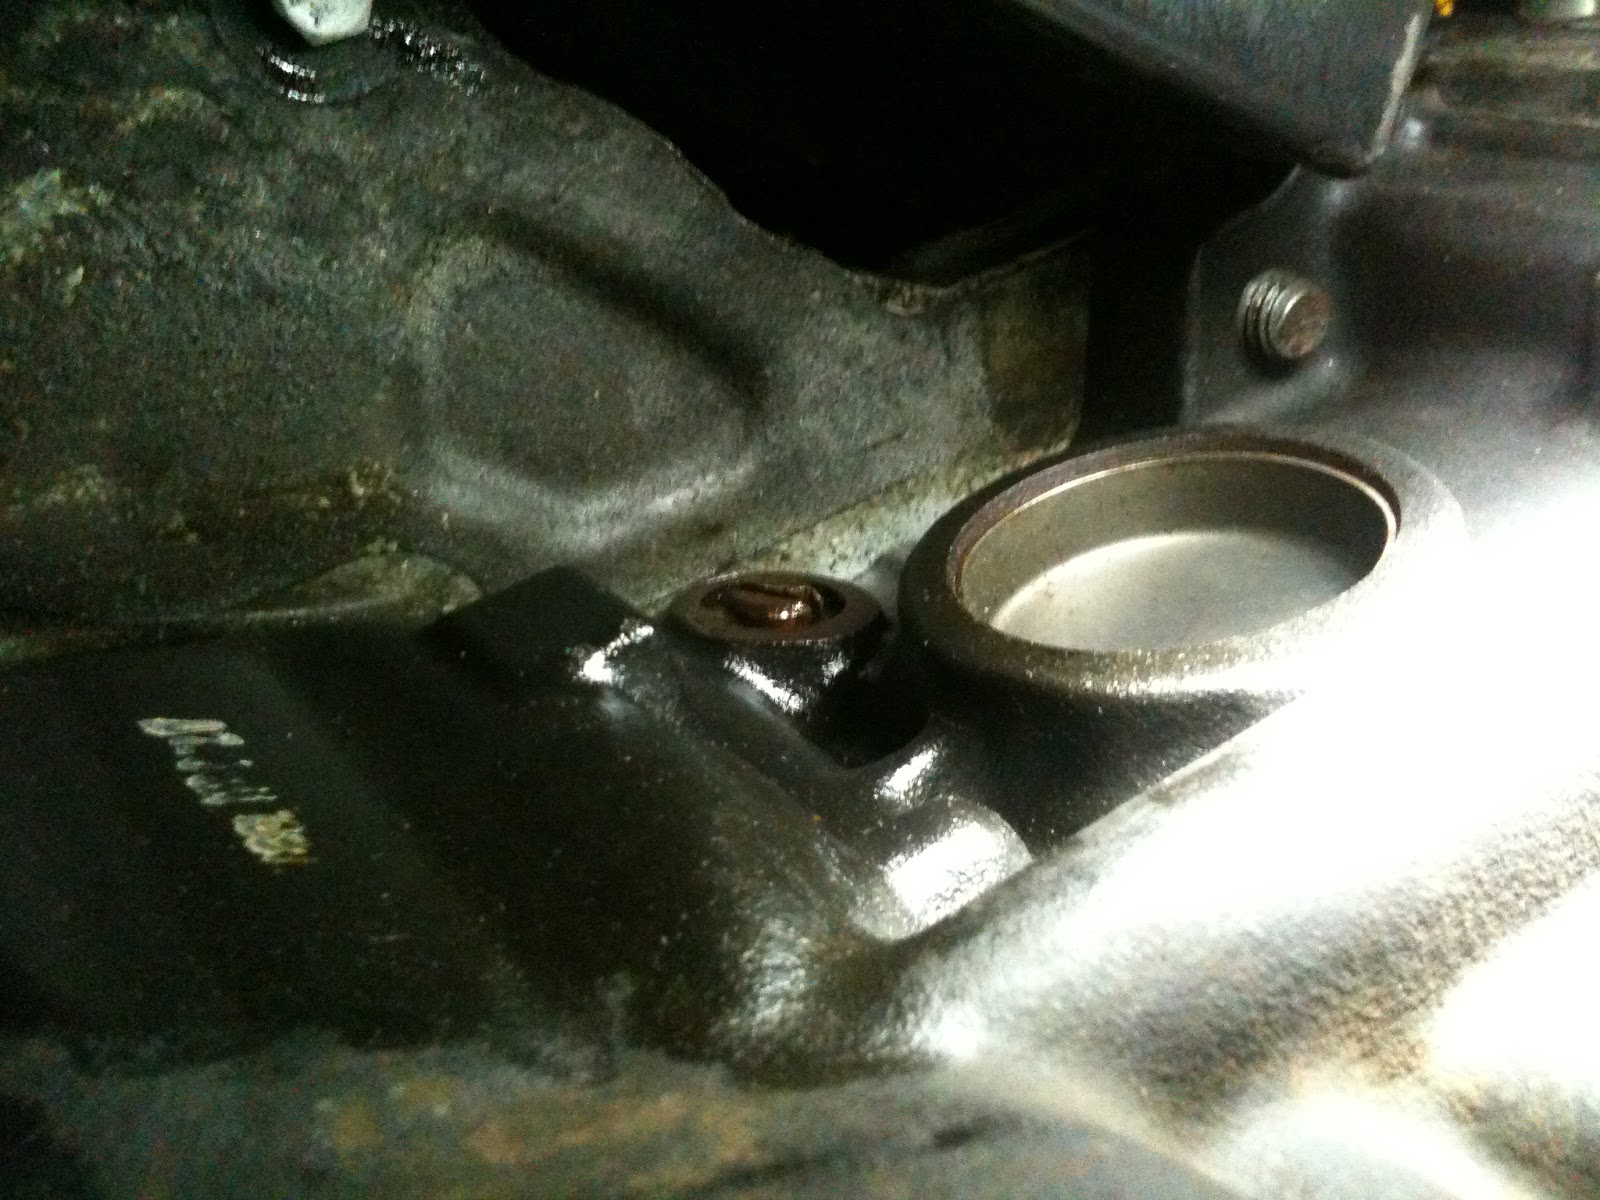
This one is still only 90% fixed, but that's probably good enough. There was a small but significant leak, which turned out to be from a little valve on the side of the block (a pressure regulator), where an O-ring had perished. Fortunately I had a suitable sized O-ring kicking about the garage, so, apart from the difficulty of accessing this with the engine in the car, this was a pretty easy fix.

The offending oil pressure valve.

Unfortunately there seems to still be a tiny leak from the sump (which I removed to sort out the oil pump after fitting the engine). It's probably not big enough for me to want to remove the sump again to fit a new gasket (really wish I'd fitted a new gasket first time round) though, so I will just keep an eye on it.

Setup
Thanks to Jason for lending me his wheel alignment kit. Having got all the wheels pointing the right direction, the car feels a lot more stable and controlled. Toe-out at the rear has been changed to toe-in, which has made the handling safer, if less entertaining.

I've also experimented with a couple of different sets of springs, but so far am sticking with the original set at 350 front and 180 rear. These are a touch on the soft side, leading to an amount of body roll, but grip and ride are good so I think I'll probably track the car like this and see how it handles on track.

Jason has also passed on a longer set of wishbones for the front, which will give me more steering lock, which is badly needed, not so much for driving around where there is just about enough lock, but more for parking and manoeuvring. These are yet to be fitted (I'll need to get some longer tie-rods to match), but this should keep me busy in the New Year.

Cycle Wings
Once again, the brackets holding these on broke, this time at a very inconvenient place (on a dual carriage way slip road in rush hour, with no hard shoulder). Not fun at all.

Peter has provided new brackets, and I've experimented a little with how I'm attaching the new wings as I want to keep them detachable, but don't want exposed bolts on the top side. I've bonded them to a bracket with studs pointing down, and then bolted the studs to the main cycle wing bracket. Hopefully the sikaflex is strong enough to keep them attached (and hopefully I've welded the studs on strongly).

New cycle wing with bracket and tube for wiring bonded on.

Main bracket ready for cycle wing.

Fuel Economy
As always, this remains a tricky problem. I saw some improvements when I removed the exhaust, and remounted it at a more natural angle. Previously the supplied brackets meant that the tubes were at a slight angle where they pushed into each other, creating a space where oxygen could be drawn in upstream of the lambda sensors (which, on detecting unused oxygen, would cause the ECU to compensate with extra fuel). A combination of new brackets and replacing the gun-gum exhaust paste I'd previously used with RTV sealant seemed to improve matters, getting fuel economy briefly up to the low thirties... but then it dropped back to low twenties again.
I've since discovered the port on the side of the engine where clean air is injected into the exhaust to improve emissions, which I had blocked off, had maybe not been as well blocked as I thought, which could be a potential source of oxygen getting into the exhaust. I've since fitted the BMW part for blocking this off (turns out the South African market doesn't care about emissions, so they make a suitable part for them), which may or may not improve things.

Other
When setting out for one test drive, I heard a scary sounding grinding noise (it can be heard in the first few seconds of this video):

Not a sick engine. At least, not as far as I know...

Fortunately, this didn't mean my engine was dead - it turned out just to be the water pump bearing failing. Removing the aux belt it was very clearly starting to seize up, so I got a new pump fitted and problem solved. I didn't replace the gasket as it was firmly stuck to the block and I was afraid of scratching the block and ruining the seal forever - this turned out the be the right choice as it didn't leak. I suspect that the tensioner may be on the way out too, but it's not making any funny noises so it will do for now.

I also finally got round to putting a hinge on the front nosecone so that I can easily access the radiator. Another job I wish I'd done ages ago - improving access always seems to be worth investing time in, something I could have benefitted from realising at the start.

So this leaves the car with working brakes, not overly leaking, and with all the wheels aligned and cycle wings fitted... could this be the long hoped for point after which it's all just fine tuning?

Thursday, 18 August 2011

More photos

Some photos from Sunday, when I drove to a BMW show up in Gaydon to exhibit the car on the GKD stand. The car went down surprisingly well with the BMW crowd - I'd expected people who are into fast big saloon cars not to be that into a 7 style car, but most people liked it and a few seemed reasonably interested in building one, so a day well spent.

The car performed well on the way there and back, but fuel consumption was, predictably, awful. Peter is sending me some new rear calipers as we suspect the problem may lie with broken calipers, so fingers crossed that will sort it.


Saturday, 13 August 2011

Stripes!

Testing on the new engine continues, with no issues other than fuel consumption, which is still poor. More importantly though, the new engine has great compression numbers (205-220 psi, i.e. a difference of less than 7%), isn't consuming oil by the bucket load, and isn't smoking heavily or running rich (no popping and banging on the overrun, which is good, although I do miss the noise). So it looks like I got lucky with a good engine this time round, fingers crossed.

The fuel consumption is a bit of a puzzle though. Clearly, it's not the engine, so it must either be a fuel leak or rolling resistance. I've thoroughly checked for fuel leaks, and found one (the pump wasn't sealing into the fuel tank very well), but fixing it (with plenty of Hylomar Blue sealant) had no effect on fuel economy, which seems to be varying from 44 mpg (pretty sure this was a bad measurement - probably still a high number, but 44 seems ridiculous) to 17 mpg, with 22 being typical. Driving style doesn't appear to be a major factor in these numbers. I've noticed that the rear brakes are dragging - I've tried grinding back the pads, centering the callipers on the discs, and bleeding the brakes, but this hasn't helped at all. Grinding the pads did sort out the issue I was having with the rears locking up first though (probably because I ground them so unevenly that the rears aren't very effective any more) - this has improved stopping distances no end. It looks like this will be an ongoing problem.

In between trying various things to sort out fuel consumption, I picked up the tonneau and fitted that. It doesn't work well with my harnesses (they need to unclip to zip the passenger / driver cover onto the boot cover, and mine aren't the unclipping type), but otherwise it is very good and greatly improves the look of the boot area.

Once that was fitted, I could finally get around to the most important feature of the car: stripes. This took longer than expected, but the results are very much worth the time.

First stripe going on. This one had to come off again as I wasn't very happy with it.

Emily gets to work on the scoop.

Stretching it round the dash. This wasn't at all easy. The hairdryer helped a bit.

Stretching over the dash. Notice the Look of Concentration.

Rear view: stripes, boot cover and M3 badge.

Front view. The numberplate seems to have fallen off.

I also stuck a couple of badges on: the GKD badge on the nose, and an M-sport badge on the rear, so that people in expensive cars know what just overtook them.

Looking forward to getting some nicer wheels on the car - some black wheels will finish it off nicely, but they will have to wait until my bank account is a bit healthier.


Sunday, 31 July 2011

Visitor in the paddock

Testing on the new engine continues with (eventually) good results.

After another test drive, the clutch problem returned. I tried to adjust it again by the roadside, but didn't enjoy crouching by the drivers (i.e., road side) side of the car at night so gave up and drove it home being careful not to press the clutch all the way in. Once cold, the problem seemed to go, so perhaps something expands when warm to create the problem

However, after adjusting the pedal as far as it will go, I had another test drive, and the problem did not return, so I think it's fixed. There is still an odd feeling to the clutch pedal as it disengages - I'm not sure what to attribute this to. It's not causing any problems though so I'm just going to ignore it until it does as I suspect the fix would be a new release bearing (i.e., engine out).

After some thought, I decided that the best way to attach the bonnet scoop would be to bond some bolts onto the scoop and then bolt it down - this will give me the option of making a new (better fitting) bonnet in the future but reuse the scoop, having spent an evening wrapping it nicely. This is the result:

Bonnet scoop drying. Bolts were attached by using very large washers covered by Sikaflex. Not sure how long Sikaflex takes to fully cure so I'm going to give it a week before attaching it.

On Friday I got up at 5:30 to trailer the car up to Fibreform for some welding. Dave got the car up on some ramps and showed me the amount of diff movement I was getting by gently jacking the diff... a bit worrying as the diff nose was lifting by 10-20 mm. After a spot of welding and strengthening he had this sorted and advised me to keep the main front mount tight, recommending lock wiring it to ensure it doesn't undo. At some point I'll undo it, thread lock it and lock wire it.

This morning I sorted out the steering wheel for the n'th time as it wasn't central - not difficult but fiddly and time consuming, but it's right at last. Midway through this I had some problems with the ignition barrel - for some reason the steering lock wouldn't release properly and prevented the key from turning. Fortunately I eventually fixed it by hitting it with a hammer, but I'm keeping a look out for a cheap Ebay replacement part.

I tried another test drive and was pleased to find that the car is performing well with no major problems.

There are a few tasks remaining: the rear brakes are dragging a bit (this is probably what was causing them to lock up before the fronts); and the traction control is playing up on the new engine. Not sure what the solution will be for the traction control. It's booked in for the tonneau fitting on Friday, which will be good to have. Also the car is very dirty and needs a clean - hopefully the vinyl wrap will clean up easily.

Finally: today's visitor to the paddock:

I found this fellow hopping around by the 328 engine.

I caught him and let him go in the field behind the house.

Friday, 22 July 2011

A very long post about putting the new engine in

It doesn't seem like a month since the old engine came out, but according to my last blog entry, apparently it was nearly a month ago that the 328 came out. With the engine in, it seems like it ought to just be a case of ticking off a few details, but as with software, the first 90% of the job takes 90% of the time, and the remaining 10% of the work takes the other 90% of the time. So it was here: all the little things took time, and interspersed with waiting for parts, the engine swap has not been particularly speedy.

After getting the engine in, I made up a mount for the oil cooler and fitted that. Unfortunately, the adapter needed to plumb it into the engine took an unreasonably long time to arrive from the U.S., and without it, I couldn't get oil pressure, and therefore couldn't start the engine or make any progress. When the overpriced but essential widget finally did arrive, I spent ages cranking the engine with no fuel and spark plugs removed (to reduce load on the crank) trying to get oil pressure. I'd been warned that this might not happen easily, and indeed it didn't.

After faffing around for ages trying to prime the oil pump I admitted defeat, drained the engine of oil, took the sump off and removed the oil pump. Since I'd already spilt a fair amount of oil on the garage floor, this involved a lot of lying on the floor, soaking it up and making a huge mess. I dismantled the pump, stuffed it full of vaseline, poured oil into the pick up pipe and sealed both ends of the pipe with vaseline to prevent the oil from escaping, and put it back. I didn't fancy doing it twice so I probably used a good half tub of vaseline. I put the sump back and then started doing up the bolts.

In so doing, I got a good view of the bottom end. It looks healthy.

The oil pump. Really hope I did that nut up tightly enough when putting it back. The internet suggests welding it on but I think that's overkill (and I can't weld), so I just followed Haynes and torqued it up with threadlock.

Shiny crank.

More crank. Note oil pick up pipes.

Underside of piston.

I was mildly concerned by the marks on the underside of the pistons, but apparently this is normal.


My pillow, post oil-pump work. Emily took it surprisingly well.

Part of bolting the sump on involves doing up a bolt inside the gearbox bell housing via a socket extension through a tiny hole. Of course, when removing the extension, the socket popped off the end of it and dropped into the inaccessible bell housing ready to destroy the flywheel. I attempted to salvage the situation with some thorough cursing, anticipating having to remove the engine to rescue the socket, but to my great surprise, it came out eventually by poking it with an allen key through the little hole.

Everything back in order, I cranked it, and got oil pressure. Phew.

With the engine in and ready to start running, I put the exhaust on, spent ages getting the manifold on, then realised that the front side panel wouldn't go over the manifold, spent ages getting the manifold off, threaded the front wing on again, then put the manifold back on... a bit of a waste of time there. To reduce any future pain I tapped the holes for every rivet that I had to drill out and replaced with little dome-head bolts instead, which is how all panels that come off will be done in future. This will make getting panels off much easier in future. Wish I'd done that everywhere to start with, although tapping all those holes would have been pretty tedious.

I also had a look at the bonnet. The throttle cable arrangement sticks up a lot on the new engine:

No way the bonnet will go over this.

So sadly I had to do this.

Which will be covered up by this. (Not fixed in place yet, hence not straight).

I'm not massively keen on having a bonnet scoop, and as a future project I will look into an alternative throttle arrangement which lets me have a nice clean bonnet again - but for now I've vinyl wrapped the scoop so it matches the bonnet and I think it will look OK.

The next step, now that the engine was getting oil pressure, was to get it started. I put the higher-pressure fuel pump in (future plan is to install the old pump at the other end of the tank to reduce oil starvation in the corners), and hooked up all the basic stuff on the engine, along with the loom. The loom is a bit of an oddity, as it's off an SMG (fancy flappy-paddle gearbox) car, so it has an extra ECU slot for the gearbox ECU, several additional connectors for the extra SMG wiring, etc. Fortunately, it turns out they will still work on a manual car - it's just a case of bridging one relay to be always connected (on an SMG car it prevents starting the car when in gear, I think). Relay identified (the half-size one next to the fuel pump relay) and bridged, I got the car sort-of running without too much difficulty.

I say sort of as it was billowing smoke, stalling a lot, idling very badly, and so on. I hooked up the lambdas from the 328 (they're a different part number but I'm pretty sure they're electrically identical), bought and fitted a new MAF, fiddled around a lot, and so on, with limited success. The only clue was that when I unplugged the MAF, it would idle OK, but as soon as I plugged it in, the revs would jump around and then the engine would stall. Jason and Ben felt that a third MAF was required, but my wallet wasn't feeling in the mood, so I kept looking for another solution. Eventually I found what I was looking for: a small vacuum leak after the MAF. This meant that the engine was receiving more air than the MAF was measuring, and hence running badly (very lean) and stalling. With the MAF unplugged, it had to estimate air based on the throttle position and the current rpms - and obviously didn't care what path the air took to get into the engine, so held a decent idle. I plugged up the hole, and got one step closer.

Unfortunately, I still had this problem:


Smokey engine. This is all too familiar. 

And this one:

Noise on pressing clutch all the way in.

The smokey engine was not a huge concern: I'd half expected this sort of thing as it hadn't been run for a while and had no doubt built up condensation while standing. After twenty minutes or so of coming up to temperature, the steam / smoke died away and since then, it's behaved properly, smoking / steaming a little when cold but not for very long.

The clutch was a much more worrying issue. I really, really didn't want to take the engine out to replace a clutch bearing... but it wasn't the kind of noise I could ignore. Pete and Peter reckoned it was a failed bearing (i.e., engine out to fix), although the sound was a bit grindy. I had a more palatable idea: I think it's the clutch release arm (which doesn't spin) contacting the pressure plate (which does). This seems plausible as it only happens right at the end of clutch travel, after the clutch has fully disengaged, as if it were very slightly over-extending. Happily the fix for this does not involve taking the engine out - it's just a case of adjusting the pedal slightly to reduce travel.

I made the necessary adjustment, and was greatly relieved to find that the clutch now operates perfectly and silently, so I think this has solved the problem.

I celebrated by quickly sticking the headlights, nose and bonnet back on, and going for a quick test drive, the first with the new engine. I kept it below 3k rpm and gently pootled about, as (a) it's the first test run, (b) it was wet and (c) the diff mount needs additional bracing before it can handle full power. The engine performed very well, although the weather didn't. After a few miles, I turned around and checked out the fault codes. There are a few that I suspect are down to minor wiring issues, and two down to missing components (air con and the fuel evaporation cannister) - so a good result. Finger crossed the new engine continues to perform well.

Sunday, 26 June 2011

Engine goes in, engine comes out..

After a recent trip to Bristol (about 360 miles round-trip), it became clear that the 328 engine was not in a viable condition. I reached this conclusion when I had to stop at a service station to put in over a gallon of oil at motorway prices (about £70). My best guess is that it's using about 1 litre per 200 miles. I've also learned that Jason's car with a 3.2 litre engine does about 30-32 mpg, so the 18 mpg that I'm seeing is nearly half what it should be. Plus, there's the cost and hassle of replacing the oil separator valve every so often because it can't handle the volume of oil coming out of the crankcase.

So I started searching Ebay for a new engine. Initially I was planning on a straight swap with another 328 for cost reasons, but ended up, inevitably, with a 3.2 litre M3 EVO engine, good for about 320 bhp, or around 450 bhp / ton - a bit less power than an R500, but a lot more torque, so performance should be acceptable. If it works, which remains to be seen. I figured that if I was going to go to all this effort, I might as well at least get something positive out of it. Plus, the redline of 7600 (with 8000 safely achievable with a little light remapping) will be considerably more fitting for a lightweight sports car than the 6200 of the 328. The only real downside of the M3 is the cost, which is considerable: I definitely won't be getting new wheels any time soon :-(

I picked the engine up on Wednesday from a garage in London. They had a couple of BMW race cars outside, so hopefully they know their stuff. They bought the engine as a spare, and rebuilt the bottom end with some new bearing shells and con rod bolts, so it ought to be in good condition.

After a bit of engine inspection and Ebaying the missing bits on Thursday, I started the swap on Friday night. Thanks to Jason and Rad-tec for sending me the bits I needed so promptly. Pictures follow:
Most exhaust ports looked like this...


But 1 and 6 looked like this. I'm not too concerned - the seller reckons it has just leaked through from storing the engine upside down (on a stand I assume). Makes sense as pistons 1 and 6 would be in the same position.

Old engine coming out.

Engine coming out. Surprisingly, not too hard doing this on my own.

Impromptu flywheel locking tool constructed using the awesome power of two hammers. This worked rather well.

Home-made clutch alignment tool. Did the job nicely.

New engine ready to go in. Note trolley for sliding gearbox onto engine.

Chassis adjusted to allow the slightly longer engine to fit in.


Unpleasant surprise - I thought the stud had been cross threaded. Happily it turned out to just be a bent stud. Phew.

All in all a fairly painless weekend (not literally, obviously - I managed to stab my finger with a stanley knife requiring swift application of superglue to stop the bleeding) but successful. I didn't get the new engine in as one of the gearbox bolts snapped when removing the gearbox from the old engine - since these can't be put in with the engine in the car, installation of the new engine will have to wait until I've obtained a new bolt. Otherwise everything is ready to drop the new one in.

Most pointless mistake of the weekend: spending an hour with the angle-grinder getting the old clutch off because I needed to reuse the plate which sits between flywheel and engine, and the bolts holding the clutch on had rounded. Once I had the flywheel off I realised that the plate, instead of going all the way around the crank, was basically U shaped and could have easily slid off without even loosening anything.

Getting the gearbox on the new engine was a bit of a faff, but the trolley helped a lot. The best method seems to be: adjust crane to get engine the right height against the gearbox. Then adjust the engine using the load-leveller so that the gearbox lines up flush vertically against the clutch housing. Readjust height slightly. Gearbox then goes on pretty painlessly. I didn't have a clutch alignment tool so I had to wing it with a socket extension wrapped in tape. As it turned out, this did the job just fine.

I can't compression test the engine until it's got some oil in it, and I can't get oil in it until the adapter turns up from America (I've gone with a very shiny custom oil cooler - the only downside being the difficulty of getting a suitable adapter). Hopefully that will be soon. Then I need to figure out the loom, and make the necessary adjustments as the loom is off an SMG gearbox car (I believe it's a simple case of jumping a relay... I just don't know which one). Then it's car back together and drive gently up to Fibreform to get the diff mount beefed up and to replace the chassis rail which I removed.