
The problem with the richness looks to be solved. It was a problem with the lambdas, but not in the obvious way.
After spending a shocking £80 on a new lambda, I did some more testing on the old lambda sensors, and, after heating them up with a blowtorch, the faulty one came back to life. I ended up replacing it anyway, as this and other data suggest that it's on the way out. So, new lambda in place, I ran the engine and attached a multimeter to the lambda output, expecting to see it start to cycle between rich (close to 5v) and lean (closer to 0v), when the engine went into closed-loop mode. Unfortunately, this didn't happen: it stayed rock steady on about 4.8v (i.e., rich).
After much head-scratching, I plugged in the laptop, and noticed that the laptop was reporting 0v coming from the lambda sensors, even though they were outputting close to 5v. A quick scan of youtube (apparently, some people like to video their sessions of plugging a laptop into their car, and in this case I'm glad they do, although in general they should probably get some kind of hobby) yielded a video of someone running the same software on the same engine, which was clearly reading correct (non-zero) lambda sensor values: so the software is clearly capable of displaying correct values. A quick check of the wiring from the lambda sensor to the ECU showed that the wiring was OK, so the evidence pointed, improbably, towards an ECU which functioned fine in all respects except that it couldn't read the lambdas properly. If the ECU thought it was seeing 0v, then it would think that the fuel mix was too lean, and inject extra fuel to try and solve the problem... hence the emissions issues, and the numbers I was seeing from the lambdas.
The theory was promising, but I needed a new ECU to test it (number four, if you're counting - the first two had immobiliser issues, and the third had the lambda issue). This also meant a new immobiliser (they are paired with the ECU) and a matching key (again, the chip in the key is paired with the immobiliser). Fortunately, they are cheap on Ebay (about £50), but unfortunately most of the breakers who sell them are absolute cretins. Example email exchange:
Me: I need the ECU, immobiliser and keys - here is a picture to avoid confusion.
Cretin: Just to confirm, you just need the ecu and the key.
In the end, I found a seller who seemed to understand that I needed three items, not two, so I ordered it. Sadly, he turned out to be useless as well, and I didn't get it until four weeks later. He claimed he was snowed in (in Glasgow), but I'm not convinced the snow lasted for four weeks.
It was worth the wait though: I plugged in the new bits, swapped the chip in the key over and ran the engine. After a short warm-up, the lambdas started cycling nicely between rich and lean readings, suggesting that the engine is no longer running rich.
Assuming there's no snow on Saturday, it looks like I might get to MOT before Christmas after all, although I will probably freeze to death on the way there. I hope they don't object to the new ECU having reduced the milage by 60,000 miles.
Thursday, 16 December 2010
Friday, 19 November 2010
Long overdue update
On the bright side, the seven continues to provide a rich learning experience, so to speak. The less cheery way of looking at it is, it still doesn't work, and in fact has even regressed in some ways.
After the failed MOT, much time was spent looking over the brakes and trying to figure out why they were seizing. The most significant factor turned out to be insufficient slack in the pedal: since the pedal (and hence the master cylinder) couldn't return fully, once pressurised, the system could never release fully, leaving the brakes dragging somewhat. As they dragged, temperatures rose (considerably), raising the pressure... which is why the car didn't make it to MOT without a rest; nothing to do with the handbrake, which was adjusted just fine.
A secondary factor, which Will and I spent quite a bit of time looking at, was the fact that even with this sorted, I still got about 3 ft-lbs of drag from each rear wheel. (For perspective, the diff on its own, being an LSD, takes about 7 ft-lbs to turn, which is just about turnable by hand using the discs, or not too hard to turn using the bigger radius of the wheels - so this roughly doubles the resistance at the rear). We tried winding back the pistons (no improvement); checking the callipers could slide freely on the pins (they could); checking the discs were central in the callipers (a washer was added on one side as a spacer to achieve this); with no improvement. Eventually I got the bench grinder out and ground the pads back by 1mm or so, trying not to inhale too much, and now they are fine.
Unfortunately a slight mishap occured while up on axle stands fixing the brakes: after everything was sorted, I started lowering the front of the car... and the rear fell off its axle stands. Happily, Emily's bike and Chris' lawnmower took most of the hit and absorbed a lot of the impact, but one rear wing of the car was damaged. It's an easy replace, but very, very annoying.

Brakes sorted and wing gaffer-taped up, I tightened up a couple of loose-ish unions that had leaked under the high pressure, topped up the fluid at the last minute, and had another go with Will following, and Becky looking nervous in the passenger seat. No issues getting there this time, but on arrival Will told me he was seeing big clouds of black smoke every time I put my foot down...
As half-expected, the engine indeed turned out to be running very rich. So rich that I hope the cat hasn't been destroyed - I don't think it's been run enough to seriously damage it, but we'll see; it was certainly another MOT fail (along with some a couple of loose nuts which will be trivial to sort out).
I've spent this week trying to figure out why the car is running so rich. I thought I had found the answer when I looked through the throttle body and saw this:

But unfortunately, inspection of a friend's healthy 328 revealed the same thing, so I don't think this can be the issue. I've ordered a new CCV valve (the bit that's supposed to separate out the oil vapours before feeding back into the manifold) anyway, which I will fit anyway, as this is probably on its last legs at 100k miles (as indeed the state of the manifold suggests).
I had a bit of a poke around the fuel rail and discovered that all the injectors click at a sensible rate, so it's unlikely that one is stuck (and all the spark plugs are equally sooty anyway, so I don't think it will be a particular cylinder that has issues). Unfortunately I don't have anything suitable to measure fuel pressure, which, if too high, would explain things, but I will look into this.
Finally, last night, I had a bit of a breakthrough. After much research into lambda sensors, I removed mine, and tested them by heating with a blowtorch (which gets them to operating temperature - about 500º - and deprives them of oxygen since it's being consumed by the flame), and measured resistance as I did so (multimeter needs to be set to read at 200kΩ). Initially it should read infinity (lots of oxygen = lean conditions), then, when lacking oxygen (rich conditions), a finite value. One of mine just reads infinity, so it's always telling the ECU that there's not enough fuel...
Fingers crossed a replacement (£80!) will sort the engine out. I'm tempted to not bother and just wire up the working one so that the ECU reads it twice, but I suppose I might as well get it right. Also there's the possibility that the ECU fuels each group of three cylinders differently, as each one feeds its own lambda sensor.
This weekend's plan, then, is to replace the broken lambda, do a lot of tests to see if the engine is functioning properly, tighten up the loose nuts, and then the car should be in a fit state to pass MOT. Assuming, of course, that the cat is still OK - it will be expensive if it isn't.
After the failed MOT, much time was spent looking over the brakes and trying to figure out why they were seizing. The most significant factor turned out to be insufficient slack in the pedal: since the pedal (and hence the master cylinder) couldn't return fully, once pressurised, the system could never release fully, leaving the brakes dragging somewhat. As they dragged, temperatures rose (considerably), raising the pressure... which is why the car didn't make it to MOT without a rest; nothing to do with the handbrake, which was adjusted just fine.
A secondary factor, which Will and I spent quite a bit of time looking at, was the fact that even with this sorted, I still got about 3 ft-lbs of drag from each rear wheel. (For perspective, the diff on its own, being an LSD, takes about 7 ft-lbs to turn, which is just about turnable by hand using the discs, or not too hard to turn using the bigger radius of the wheels - so this roughly doubles the resistance at the rear). We tried winding back the pistons (no improvement); checking the callipers could slide freely on the pins (they could); checking the discs were central in the callipers (a washer was added on one side as a spacer to achieve this); with no improvement. Eventually I got the bench grinder out and ground the pads back by 1mm or so, trying not to inhale too much, and now they are fine.
Unfortunately a slight mishap occured while up on axle stands fixing the brakes: after everything was sorted, I started lowering the front of the car... and the rear fell off its axle stands. Happily, Emily's bike and Chris' lawnmower took most of the hit and absorbed a lot of the impact, but one rear wing of the car was damaged. It's an easy replace, but very, very annoying.

Brakes sorted and wing gaffer-taped up, I tightened up a couple of loose-ish unions that had leaked under the high pressure, topped up the fluid at the last minute, and had another go with Will following, and Becky looking nervous in the passenger seat. No issues getting there this time, but on arrival Will told me he was seeing big clouds of black smoke every time I put my foot down...
As half-expected, the engine indeed turned out to be running very rich. So rich that I hope the cat hasn't been destroyed - I don't think it's been run enough to seriously damage it, but we'll see; it was certainly another MOT fail (along with some a couple of loose nuts which will be trivial to sort out).
I've spent this week trying to figure out why the car is running so rich. I thought I had found the answer when I looked through the throttle body and saw this:

Oil in the inlet manifold.
But unfortunately, inspection of a friend's healthy 328 revealed the same thing, so I don't think this can be the issue. I've ordered a new CCV valve (the bit that's supposed to separate out the oil vapours before feeding back into the manifold) anyway, which I will fit anyway, as this is probably on its last legs at 100k miles (as indeed the state of the manifold suggests).
I had a bit of a poke around the fuel rail and discovered that all the injectors click at a sensible rate, so it's unlikely that one is stuck (and all the spark plugs are equally sooty anyway, so I don't think it will be a particular cylinder that has issues). Unfortunately I don't have anything suitable to measure fuel pressure, which, if too high, would explain things, but I will look into this.
Finally, last night, I had a bit of a breakthrough. After much research into lambda sensors, I removed mine, and tested them by heating with a blowtorch (which gets them to operating temperature - about 500º - and deprives them of oxygen since it's being consumed by the flame), and measured resistance as I did so (multimeter needs to be set to read at 200kΩ). Initially it should read infinity (lots of oxygen = lean conditions), then, when lacking oxygen (rich conditions), a finite value. One of mine just reads infinity, so it's always telling the ECU that there's not enough fuel...
Fingers crossed a replacement (£80!) will sort the engine out. I'm tempted to not bother and just wire up the working one so that the ECU reads it twice, but I suppose I might as well get it right. Also there's the possibility that the ECU fuels each group of three cylinders differently, as each one feeds its own lambda sensor.
This weekend's plan, then, is to replace the broken lambda, do a lot of tests to see if the engine is functioning properly, tighten up the loose nuts, and then the car should be in a fit state to pass MOT. Assuming, of course, that the cat is still OK - it will be expensive if it isn't.
Monday, 8 November 2010
Saturday, 6 November 2010
Deferred success
The good news is that the engine now appears fully sorted. The two problems that I'd observed - low compression and a faulty MAF can be blamed on a faulty compression tester and a bug in the laptop software. Phew. A lot of time wasted trying to track down non-existent problems due to faulty diagnosis tools, but at least I'm happy with the state of the engine now. Better wasted time than a dead engine, although it means no M3 engine for now...
Pete lent me a different compression tester, which produced numbers in the range 160-175 (cold, dry), which is slightly above what Haynes says I should expect, and all within 10% of each other - so this is completely OK and suggests that there is no compression issue. Assuming, of course, that Pete's tester is not faulty - but given that he's used it before and mine has only been used on the seven, and also that I wouldn't expect it to run at all, let alone with no obvious symptoms, with a PSI of 35 (which is what mine measured), I'll assume mine is broken.
The MAF issue seems to be simply that carsoft wasn't displaying sensible values for airflow on the laptop. We replaced it with a pot, and twiddling the pot made the engine stall, so the ECU is obviously reading it and using the data from it. But still the laptop displays non-changing values as I twiddle the pot, which fairly clearly points to a software bug. Unplugging both MAF and throttle position sensor causes a stall, again, as expected; unplugging just the MAF causes a little twitch in the revs, again, normal. So all signs suggest a laptop software bug.
On Thursday, Will came over and we spent the day going over the car before MOT. Will spotted a potential issue with how the handbrake attached, and very kindly went and made up some pins to attach it with on his lathe (although I secretly suspect he was just missing his lathe after a year apart from it). He also managed to resolve the dragging rear brakes... or so we thought. We also tightened up the suspension bolts, cleaned up some wiring under the bonnet, and probably did some other minor things that I've forgotten.
Today was MOT day. I'd stupidly booked it for 8am so had to get up at silly o'clock to drive there. Insurance sorted (turns out sevens are really cheap to insure, which is cool), we set out, me wrapped up in snowboarding gear. It was wet and cold, so I didn't try giving it much in the way of throttle, so sadly can't report on how nippy the car felt.
Unfortunately, halfway there, the car was getting less and less responsive, and I had to pull over and stop. It turned out that the rear brakes were well on their way to melting - I'm not sure if this was because the handbrake had been on very slightly, or Will didn't get the rear brake adjustments right. I suspect the former, because both were equally affected... wonder if I should have fitted a handbrake switch. After ten minutes, we decided to try carrying on, which probably would have worked, if I hadn't run out of petrol.
I sent Emily off to buy some, and eventually we made it to the MOT centre.
Unfortunately, the short of it is they abandoned the test due to a loose steering rack, and leaking brake fluid. I'm sure the former is just a case of being loosened by the vibrations of being driven for the first time, so an easy fix (tighten the bolts). The latter might well be the fluid having boiled, since I had zero drips in the garage (although of course this was the first time I'd used the brakes significantly), but I will need to investigate this and make sure all the connections are tight.
I trailered the seven home (thanks Simon for the use of the trailer)... repairs start tomorrow; the MOT is now next Saturday. Technically it will be a first time pass as they didn't perform the MOT today, just took one look at the fluid leak and didn't bother, so that's what I will be telling people.
Videos of the first drive to follow...
Wednesday, 3 November 2010
MOT with a broken engine
The past week or two has been mostly spent trying to understand the various engine issues.
Firstly, after noticing the quantity of smoke produced, and the appearance of some white-yellow mayonnaise-ish looking gunk under the oil filler, I tried a quick compression test, with alarming results.
Expected range for this engine is 142-156 psi (when hot). I couldn't easily get the engine hot without driving it, so I did it cold / warm, and ended up with values between 35 (cold, dry) - 90 (warm, wet [i.e. with a drop of oil in the cylinder]). This was pretty inconclusive, but:
- cylinder 2 looks a bit lower than the others, indicating head gasket issues or liner wear
- all these numbers are very low
Other issues: the car is, or has been running, very rich, hence the smoke.
However, after discussions with Will and others, I've come to the conclusion that there are no symptoms directly attributable to the low compression, so I am inclined to ignore this until I find otherwise, as the fixes are either expensive (head gasket) or very expensive (liner wear = new engine).
We plugged the car into the laptop, and using that and a multimeter, decided that the MAF (airflow sensor) was probably not working, which would explain the richness. Will tried hooking up a pot in place of the MAF and twiddling it by hand to achieve a good idle, and we found that the car would stall when it was twiddled too far, proving that the ECU is indeed using a reading from the MAF. So it was duly replaced with a second-hand MAF off Ebay (new ones are £200, hence the preference for a £20 second-hand one).
However, results with the new MAF are not very clear. The car runs much the same, and again the laptop does not show a change in airflow when I blip the throttle. However:
- wiring between ECU and MAF has been tested and found good
- The signal coming off the MAF is in the right range and responds to throttle blips
Tonight I tried hooking up a pot in place of the MAF again, and seeing what the laptop had to say. It turns out that the laptop still didn't display useful data, even though the car would once again stall if I twiddled it too far - the obvious conclusion being that the software isn't displaying a correct value.
So, the way forward seems to be to assume that the MAF is working OK, that the over-fueling is a thing of the past, and see what happens at MOT on Saturday. The emissions tests will hopefully tell me some useful things. It might even pass.
Longer term, I doubt that the engine is in good shape given the compression numbers, but I guess I can always look for an M3 engine when my bank account is a little healthier - I suspect the engine will probably run for now.
Sunday, 24 October 2010
First drive
Lots of progress on various things this weekend. Saturday was mostly electrical: sorting out the reverse light wiring, and extending the wires on the lambda sensors. Unfortunately it turns out that they use solder-defying wire, so I had to use two sets of bullet connectors to insert an extra section of wire, which was a bit tedious, but should work fine.
While I was at it, I got annoyed with the ECU reporting an error for the missing fuel vapour valve (on a proper car, it takes fuel vapour from the tank and feeds it into the air intake when getting a perfect air/fuel mix isn't critical [i.e., part throttle with a warm engine]). I don't have this facility on my car, so I removed the valve. Since the ECU complained, I measured the resistance of the valve, which was about 42 ohms, and stuck in the closest resistor I could find instead (200 ohms), which seemed to keep the ECU happy.
Today was mainly spent working on the bonnet. Emily helped me fine tune the shape, after which we attached the bonnet clips. I'm not completely happy with the fit, but I think it's about as good as we're going to get without cutting a new bonnet from scratch from a fresh aluminium panel.
The plan was then to drive out onto the drive and set up the geometry, but it was a bit dark, so in the end we just tidied the garage and drove back in again. Still, first drive: it went well, although there was a fair bit of smoke from the engine. Will suggests that it may be too rich, caused by faulty air or coolant temperature senors, or maybe just the lambda sensors not being warmed up. Need to try and figure out what's going on here or it will likely fail MOT. Fingers crossed it's not burning oil because of fatal engine issues...
I let Emily drive the car back into the garage. Happily, she didn't crash.
Emily, not crashing or speeding. Phew.
Tuesday, 19 October 2010
The road to Hell
... is paved, they say, with good intentions, and so it proved for me over the weekend.
It started well: it looked like some bits for attaching the clutch switch weren't going to turn up on time, but I was rudely awakened on Saturday by a knock at the door, which turned out to be the postman with the clutch switch. Glad I got up to answer it then.
Plumbing it in was relatively painless, surprisingly - I cut the braided clutch hose, following Peter's advice to use side-cutters, and then switching to a hacksaw when they proved ineffective (the hacksaw worked much better, though I recommend wrapping the hose in tape first to prevent fraying), and attached new end pieces to the cut ends, which, as they have not leaked so far, seem to be good. I cable-tied the switch into place (more on this later), and set about bleeding the clutch.
This went surprisingly badly: despite the reservoir having plenty of fluid in, nothing was coming through. In the end I gave up for the day.
On Sunday, Will came over and had a poke around the car for me. He pointed out that the gearbox switch was clearly going to fail IVA, because it caused the wires to rub against a panel, so after some deliberation we decided to chop the switch down with a hacksaw. Despite very limited access, we were mostly successful, although some work still remains to be done to insulate the wires which now occasionally touch and randomly light the reverse light.
He also pointed out that I could do a better job of mounting the clutch switch. This was clearly true, so with the best intentions, we made up a bracket to mount it onto, and tried to attach it. At this point I snapped off a bolt in the block and after much cursing, was unable to remove it.
Will left me to it at this point, but undeterred, I made up a new bracket which conveniently covered up the mess I'd made with the previous attempt, and got the clutch switch mounted in a much more satisfactory way.

Whilst tidying up, I noticed that the clutch hose was now a little twisted. Once again with good intentions, I detached it from the master cylinder, rotated the end by 180 to remove the kink, and reattached it... at which point I cross-threaded the bolt and damaged the thread in the master cylinder.
This evening, then, was spent removing the master cylinder to get decent access to it, running a tap down it, and reattaching it. Fortunately the repair process was painless and after a couple of hours, I had everything back in place, with the clutch properly bled, and the switch functioning properly.
Now that I no longer need access to this part of the car, I permanently fixed on the drivers-side front wing, and then the exhaust. It's looking very nearly ready for an MOT...

It started well: it looked like some bits for attaching the clutch switch weren't going to turn up on time, but I was rudely awakened on Saturday by a knock at the door, which turned out to be the postman with the clutch switch. Glad I got up to answer it then.
Plumbing it in was relatively painless, surprisingly - I cut the braided clutch hose, following Peter's advice to use side-cutters, and then switching to a hacksaw when they proved ineffective (the hacksaw worked much better, though I recommend wrapping the hose in tape first to prevent fraying), and attached new end pieces to the cut ends, which, as they have not leaked so far, seem to be good. I cable-tied the switch into place (more on this later), and set about bleeding the clutch.
This went surprisingly badly: despite the reservoir having plenty of fluid in, nothing was coming through. In the end I gave up for the day.
On Sunday, Will came over and had a poke around the car for me. He pointed out that the gearbox switch was clearly going to fail IVA, because it caused the wires to rub against a panel, so after some deliberation we decided to chop the switch down with a hacksaw. Despite very limited access, we were mostly successful, although some work still remains to be done to insulate the wires which now occasionally touch and randomly light the reverse light.
He also pointed out that I could do a better job of mounting the clutch switch. This was clearly true, so with the best intentions, we made up a bracket to mount it onto, and tried to attach it. At this point I snapped off a bolt in the block and after much cursing, was unable to remove it.
Will left me to it at this point, but undeterred, I made up a new bracket which conveniently covered up the mess I'd made with the previous attempt, and got the clutch switch mounted in a much more satisfactory way.

Clutch switch bracket (attempt no. 2). Note cross-threaded banjo bolt.
Whilst tidying up, I noticed that the clutch hose was now a little twisted. Once again with good intentions, I detached it from the master cylinder, rotated the end by 180 to remove the kink, and reattached it... at which point I cross-threaded the bolt and damaged the thread in the master cylinder.
This evening, then, was spent removing the master cylinder to get decent access to it, running a tap down it, and reattaching it. Fortunately the repair process was painless and after a couple of hours, I had everything back in place, with the clutch properly bled, and the switch functioning properly.
Now that I no longer need access to this part of the car, I permanently fixed on the drivers-side front wing, and then the exhaust. It's looking very nearly ready for an MOT...

Nearly ready for MOT?
Edit: props to Emily for her brainwave when it came to fitting the exhaust. (Using a jack to raise the manifold up slightly made it a lot easier to get it on).
Wednesday, 13 October 2010
Panels and exhaust
After some delays, my replacement primary and the silencer arrived in the post. With Emily packed off to Germany for the weekend, I spent it almost entirely in the garage working on the car.

First up, I fitted the new primary - this one clears everything with plenty of space. With that attached, I put on the manifold, and trial fitted the silencer.

It's pretty big (8" diameter), but it has twin cats which are good for 300 bhp, so there's plenty of headroom for future engine upgrades. Most importantly, the sound is great: not too quiet, not too loud, with a nice growly sound at idle and a really sporty noise when I poke the throttle a bit.
Once the exhaust mounts were in, I was finally able to bolt down the driver's seat, and attach the rear wheel arch and drivers-side wing.
Saturday's main goal was to run the engine, now that I had a silencer to keep from upsetting the neighbours, and see if everything worked as it came up to temperature. I gave it about 10-15 minutes, during which time the radiator got warm, and no leaks developed, or anything else untoward, other than the Racelogic traction control reading the revs about 50% too high. A bit of internet research suggests that it is probably configured for a 4-cylinder engine, which would make sense, so this will likely be an easy fix. I also tweaked the switches on the dash so that they light up dimly with the sidelights, and brightly when in use.
On Sunday I enlarged and finalised the hole for the exhaust primaries in the front wing; then Rich came round to help have a look at the bonnet. He spent most of the afternoon having a nap in the drivers seat, but eventually he woke up and we got round to lining up the bonnet and bending it. Conveniently, the exhaust is about the right radius to bend it over.

Unfortunately, the bonnet predates a design change where Peter moved to having flared front wings, to allow hot air to vent at the sides of the engine bay. This means that the rear end of the bonnet needs to come out about 15mm further each side... which I think is the cause of the 10mm vertical gap to the wings. It would be possible to flatten out the lip at the bottom and rebend it, but I can't imagine the result would be very pretty, so I think the best solution will be to get a new, slightly bigger bonnet.
There are a few things left to do before I get an MOT and IVA test, but not many. I need to fit a clutch switch for the traction control to do its full-thottle-gearshift magic (not an IVA requirement, obviously, but access is much easier before I rivet on the drivers-side front wing); cover up some sharp edges with rubber trim; fit the fourth wheel-speed sensor; sort out the bonnet; setup the suspension geometry... and that's more or less it.
I'm tempted to book an MOT a long way away, as (I believe) I can legally drive to it, but this is probably unwise. Tempting though.

Exciting parcel.

Silencer on.
It's pretty big (8" diameter), but it has twin cats which are good for 300 bhp, so there's plenty of headroom for future engine upgrades. Most importantly, the sound is great: not too quiet, not too loud, with a nice growly sound at idle and a really sporty noise when I poke the throttle a bit.
Once the exhaust mounts were in, I was finally able to bolt down the driver's seat, and attach the rear wheel arch and drivers-side wing.
Saturday's main goal was to run the engine, now that I had a silencer to keep from upsetting the neighbours, and see if everything worked as it came up to temperature. I gave it about 10-15 minutes, during which time the radiator got warm, and no leaks developed, or anything else untoward, other than the Racelogic traction control reading the revs about 50% too high. A bit of internet research suggests that it is probably configured for a 4-cylinder engine, which would make sense, so this will likely be an easy fix. I also tweaked the switches on the dash so that they light up dimly with the sidelights, and brightly when in use.
On Sunday I enlarged and finalised the hole for the exhaust primaries in the front wing; then Rich came round to help have a look at the bonnet. He spent most of the afternoon having a nap in the drivers seat, but eventually he woke up and we got round to lining up the bonnet and bending it. Conveniently, the exhaust is about the right radius to bend it over.

Bonnet on. Looking really close to being complete now...
Unfortunately, the bonnet predates a design change where Peter moved to having flared front wings, to allow hot air to vent at the sides of the engine bay. This means that the rear end of the bonnet needs to come out about 15mm further each side... which I think is the cause of the 10mm vertical gap to the wings. It would be possible to flatten out the lip at the bottom and rebend it, but I can't imagine the result would be very pretty, so I think the best solution will be to get a new, slightly bigger bonnet.
There are a few things left to do before I get an MOT and IVA test, but not many. I need to fit a clutch switch for the traction control to do its full-thottle-gearshift magic (not an IVA requirement, obviously, but access is much easier before I rivet on the drivers-side front wing); cover up some sharp edges with rubber trim; fit the fourth wheel-speed sensor; sort out the bonnet; setup the suspension geometry... and that's more or less it.
I'm tempted to book an MOT a long way away, as (I believe) I can legally drive to it, but this is probably unwise. Tempting though.
Tuesday, 28 September 2010
Traction control progress
Some progress here: three out of four sensors are mounted in the uprights, and appear to be giving sensible readings, though I won't really know for sure until I've calibrated the system properly. At any rate, when I turn the wheel, the current output by the sensor varies, and is detected by the traction control box, so I'll assume that's working for now.

The control unit is now mounted. Not totally sure if this is secure enough from thieves (it's currently stuck on to a bracket with velcro); I might have to fix it a bit more permanently. It looks good though, and some fiddling reveals that the previous owner bought all the upgrades, so I can do full-throttle shifting once I get a clutch switch installed. This should be easy, it's just a hydraulic switch on a T-piece mounted on the clutch hose.
Also: I asked Racelogic about the upgrade screen issue - they got back to me with a solution within hours on a Sunday. Can't complain about that.

Traction control switch mounted.
The control unit is now mounted. Not totally sure if this is secure enough from thieves (it's currently stuck on to a bracket with velcro); I might have to fix it a bit more permanently. It looks good though, and some fiddling reveals that the previous owner bought all the upgrades, so I can do full-throttle shifting once I get a clutch switch installed. This should be easy, it's just a hydraulic switch on a T-piece mounted on the clutch hose.
Also: I asked Racelogic about the upgrade screen issue - they got back to me with a solution within hours on a Sunday. Can't complain about that.
Saturday, 25 September 2010
Budget: blown
The original intention was to fit traction control, but as the car progressed and my bank account got smaller, I had decided to shelve this for a future project. However, I was unable to resist a (relatively) cheap Ebay auction, so I spent today fitting the Racelogic traction control system and trying hard not to think about my overdraft.
Despite some worrying communications from the Ebay seller (paraphrasing, me: "does it come with all connectors, wires etc"; him: "what are wires?"), it turned up with all the connectors and many metres of wires. As the only space on my bulkhead was right under the dash, all of the wires needed to be trimmed down substantially, so most of the day was spent soldering.
A few niggles arose: the "you are about to reverse park in a hedge" light is switched earth, as opposed to the dashboard lights, which are switched live, so driving the ABS light in the instrument cluster from the traction control will require me sorting out some sort of relay. Also, there seems to be a software issue with the unit itself - when turned on, instead of going into the normal mode, it goes into firmware-flash mode and prints "Waiting for Upgrader" until I twiddle the controls a bit. Probably need to contact Racelogic and find out what's going on here.
Lots of wiring remains to be done; there is the small matter of hooking into the fuel injectors and fitting sensors at each wheel, but the important part is to get the under-dash stuff done so I can bolt the scuttle in.
Sunday, 19 September 2010
Exhaust progress (part 2)
Lots of exhaust progress today. I started out by replacing the Elise exhaust mounting bushes, which had worn through and were letting the exhaust rattle around. Much fiddling later, I then started work on the seven.
I'd been putting off cutting out the hole for the exhaust for a while, mainly because it offered lots of potential for awful mistakes. I started by making a template which would fit around the exhaust primaries:

In the process of doing this, I noticed that one of the primaries was actually touching the chassis. It looks like this will have to go back to the exhaust people for adjustment, which is a pain as it will probably delay completing the car. Hitting it with a hammer would probably work but would look pretty shoddy, and it would be a shame to make a mess of the shiny exhaust.

Leaving that for now, I got on with nibbling out a hole in the panel:

As expected, the panel wasn't as bendy as the template, so considerable enlargement was required before it would fit:

Finally, it fit. The final result is pretty good, though the spacing around the edge is rather variable. This was inevitable really, as the panel needs to slide over the primaries into place. There's more space than I would like on the right, and a few places (top middle, left edge) which probably need filing back 5mm or so.

I'd been putting off cutting out the hole for the exhaust for a while, mainly because it offered lots of potential for awful mistakes. I started by making a template which would fit around the exhaust primaries:

Exhaust template.
In the process of doing this, I noticed that one of the primaries was actually touching the chassis. It looks like this will have to go back to the exhaust people for adjustment, which is a pain as it will probably delay completing the car. Hitting it with a hammer would probably work but would look pretty shoddy, and it would be a shame to make a mess of the shiny exhaust.

Exhaust primary touching chassis (nearest tube touches the diagonal rail)
Leaving that for now, I got on with nibbling out a hole in the panel:

Starting to make an exhaust shaped hole.
As expected, the panel wasn't as bendy as the template, so considerable enlargement was required before it would fit:

Embiggened hole.
Finally, it fit. The final result is pretty good, though the spacing around the edge is rather variable. This was inevitable really, as the panel needs to slide over the primaries into place. There's more space than I would like on the right, and a few places (top middle, left edge) which probably need filing back 5mm or so.

Sunday, 29 August 2010
Tidying up
On Tuesday, Peter came down for a quick pre-IVA check, on his way back from Up North to pick up his supercharger prototype. We spent some time going over the car, and as a result I have a long list of things to do. A lot of it is simple stuff (cover all wires, rubber covers for all exposed sharp edges, etc), but a few tasks were more substantial.
The most significant of these was making a cover for the wiring on the passenger side - conceivably, a passenger might kick the wiring while flailing around in terror, so Peter felt it would be a good idea to make some kind of panel to cover it. Fortunately I had the old rear panel which didn't fit lying around, so I put aside all thoughts of tendonitis and got out the tin snips.


The most significant of these was making a cover for the wiring on the passenger side - conceivably, a passenger might kick the wiring while flailing around in terror, so Peter felt it would be a good idea to make some kind of panel to cover it. Fortunately I had the old rear panel which didn't fit lying around, so I put aside all thoughts of tendonitis and got out the tin snips.

Panel in progress.

Finished panel in place.
Drilling rivet holes for this panel (they come up from underneath) was, to say the least, inconvenient, but I'm pleased with how it turned out. The passenger view of the car is now a lot more tidy.
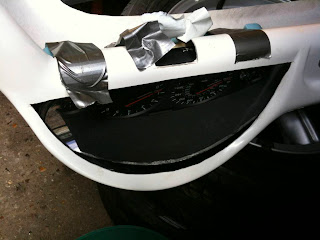
With the scuttle off, I also took a long hard look at the dash, and decided to take it out and re-fit it a third time, due to the excessive gaps around the BMW clocks. Getting it out wasn't too bad, although it would have been easier if I hadn't got carried away with using so much of the squirty foam. After much effort with a dremel (note: by far the best attachment for adjusting big holes in fibreglass is the little cylinder of sandpaper), I got a fairly decent fit. There are still gaps around the sides, but they're quite small. I painted the inside of the scuttle black to make the gaps a little less obvious, then sealed the clocks in again.

Waiting for the foam to set.

Dash in place. Note the panel covering up the wiring on the passenger side.
Finally I took a look at the side repeaters. After an hour of reading the IVA manual and browsing the internet, I'm still not certain that my placement will pass IVA - it depends if they test for visibility with the steering at full lock, or not. I think this is where Caterham currently put their repeaters, though, so it ought to be OK.

Side repeaters in place on the front cycle wings.
Sunday, 22 August 2010
Last day of retirement
Sadly today is my last day of retirement; tomorrow it's back to work. I didn't quite get the car ready for IVA, which is what I was aiming for, but it's very close. Apart from the silencer, which won't be ready for a week or two, only some minor work on panels and lights remains, probably less than a weekend's worth. I'm happy with that.
Lots of minor tweaks: the front lights are now properly wired up and in place; the under-dash wiring is finished and has been tided up; various panels have been riveted on; the fuel tank is in, with support brackets to stop it shifting around; the rear lights have been fitted, and probably lots of other minor things I've forgotten.

Today I started out by drilling the holes for fitting the dash. I can't fit it yet because the panel it sits on top of can't be attached until the silencer is in, but it's ready to bolt on when that happens.
Emily then came back from rowing and came to help fit the rear cycle wings.

This was tricky, as access to some of the bolts was extremely tight. Probably should have done this without the fuel tank in, but we managed. Unfortunately, after getting it on, Emily realised that the wings are not symmetrical, and we'd managed to get them on the wrong way round. Not sure why she couldn't have realised that before we bolted it in... At least we'd only done one wing when we realised. We removed it, and drilled holes in the other wing that lined up with the holes we'd made in the chassis to mount the first wing. Everything lined up reasonably well, so we bolted it in. At this point Emily realised that she'd managed to bolt in the ratchet spanner in such a way that it couldn't easily be removed, so we had half an hour of fun and games fiddling about in a tiny, blind space trying to remove it.
Eventually we got the wings on, and then stuck the rear light clusters on. This was basically easy, except for the lack of reference points from which to measure to get the lights level and in the right place. It didn't help that the garage floor slopes significantly (in both dimensions). Eventually we ended up with this, which I'm pretty happy with:

Lots of minor tweaks: the front lights are now properly wired up and in place; the under-dash wiring is finished and has been tided up; various panels have been riveted on; the fuel tank is in, with support brackets to stop it shifting around; the rear lights have been fitted, and probably lots of other minor things I've forgotten.

Rear lights in progress.
Today I started out by drilling the holes for fitting the dash. I can't fit it yet because the panel it sits on top of can't be attached until the silencer is in, but it's ready to bolt on when that happens.
Emily then came back from rowing and came to help fit the rear cycle wings.

Cycle wing going on. The observant will notice that this is the drivers-side wing...
This was tricky, as access to some of the bolts was extremely tight. Probably should have done this without the fuel tank in, but we managed. Unfortunately, after getting it on, Emily realised that the wings are not symmetrical, and we'd managed to get them on the wrong way round. Not sure why she couldn't have realised that before we bolted it in... At least we'd only done one wing when we realised. We removed it, and drilled holes in the other wing that lined up with the holes we'd made in the chassis to mount the first wing. Everything lined up reasonably well, so we bolted it in. At this point Emily realised that she'd managed to bolt in the ratchet spanner in such a way that it couldn't easily be removed, so we had half an hour of fun and games fiddling about in a tiny, blind space trying to remove it.
Eventually we got the wings on, and then stuck the rear light clusters on. This was basically easy, except for the lack of reference points from which to measure to get the lights level and in the right place. It didn't help that the garage floor slopes significantly (in both dimensions). Eventually we ended up with this, which I'm pretty happy with:

Rear lights all in place.
Friday, 20 August 2010
Exhaust progress
On Thursday I ventured up North to pick up my shiny new exhaust manifold, and also meet Jason and see how he's been getting on. After meeting Jason's (very cute) dogs, we had a browse around his car - it's making good progress. It's interesting to see the different choices he's made with the car - partly in spec, e.g. the roll cage, flash wheels, etc, but also in how it's put together. The oil cooler setup in particular looks very nice; I don't think it'll have any overheating issues.
The exhaust was sadly only half ready, but at least it was the manifold half - if it had been the silencer half I wouldn't have been able to do anything with it. It came like this:

After some fairly straightforward fitting, I ended up with this:

It sounds great:
What was less great was getting the steering column to run through the limited space available. It's suppose to run between primaries one and two, but in my case, it was touching primary one. After a full day of faffing, moving the steering column support bracket and the steering rack, I finally managed to find positions where it clears the primary by a full 5 mm, and the chassis rail on the other side by about 1 mm. That will have to do. I also rerouted the clutch hose, as it was running right past one of the primaries and would have got rather toasty.
The exhaust was sadly only half ready, but at least it was the manifold half - if it had been the silencer half I wouldn't have been able to do anything with it. It came like this:

Exhaust manifold.
After some fairly straightforward fitting, I ended up with this:

Manifold attached.
It sounds great:
Lots of smoke - this is just from the new pipes. It's gone now.
What was less great was getting the steering column to run through the limited space available. It's suppose to run between primaries one and two, but in my case, it was touching primary one. After a full day of faffing, moving the steering column support bracket and the steering rack, I finally managed to find positions where it clears the primary by a full 5 mm, and the chassis rail on the other side by about 1 mm. That will have to do. I also rerouted the clutch hose, as it was running right past one of the primaries and would have got rather toasty.
Monday, 16 August 2010
Loud car is loud
Finally today, all the immobiliser parts arrived, so I set about wiring in the immobiliser. Well, I say all the parts, but actually I still haven't managed to source the plugs, so I had to improvise there.


An old computer lead was a reasonable fit on the key transmitter. I used the bench grinder to cut it down to fit, and it was ideal. For the immobiliser, I didn't bother with a plug and just used bullet connectors on each pin.
Thanks to Peter's wiring diagram, wiring it in was fairly straightforward, and after a few hours, everything was ready. I turned the key and... nothing. I then remembered to swap the ECU to the one that came with the immobiliser and tried again:
It's rather loud.
A few niggles remain - the idle seemed to climb slowly past 2500 rpm (at which point I turned it off) - I guess this is something like the EGR hose not being blocked off, or maybe an ICV issue. I'll have a look at this tomorrow.

I found an old computer lead that was near enough the right size - a bit of mangling and it fitted.

Wires going onto the immobiliser.
An old computer lead was a reasonable fit on the key transmitter. I used the bench grinder to cut it down to fit, and it was ideal. For the immobiliser, I didn't bother with a plug and just used bullet connectors on each pin.
Thanks to Peter's wiring diagram, wiring it in was fairly straightforward, and after a few hours, everything was ready. I turned the key and... nothing. I then remembered to swap the ECU to the one that came with the immobiliser and tried again:
It's rather loud.
A few niggles remain - the idle seemed to climb slowly past 2500 rpm (at which point I turned it off) - I guess this is something like the EGR hose not being blocked off, or maybe an ICV issue. I'll have a look at this tomorrow.
Saturday, 14 August 2010
Dash progress and mistakes
I spent Friday working on the dash. This ought to have been simple, but in actual fact I made so many errors that it took all day...

Marking up the dash for cutting.
First mistake was using black permanent marker on a white dashboard. After cutting out, I'd stayed just inside the lines with the jigsaw, so I had to spend an hour with the dremel rubbing off the marker. For once, the dremel did a reasonably good job, although there are some off-white bits where the pen smeared.

Cutting the dash out of the scuttle, mistakes two and three.
Mistake two was to cut out the wrong shape. The dash pod is rounded at the bottom corners, but I forgot this when cutting out the curved section, so I'm left with annoying little holes at the bottom corners. I guess I can tidy this up with some polyfiller or something, but it is very irritating to have such a visible mistake.
Mistake number three was less permanent, but took time to correct. I put the dash pod in, then sealed it in with expanding foam while I popped off to buy a hole saw from McKays (mistake number four). I got back, trial fitted the dash, and discovered that the dash pod was at such an angle that it contacted the steering column in such a way that the scuttle sat with an approximately 20mm gap from the chassis...
Fortunately the expanding foam is a good choice for sealing in the dash pod - a few minutes with a screwdriver and I was able to scrape it all out, then pull out the dash pod, and get the jigsaw out again to cut back more of the scuttle. I sealed in the dash with some more foam, and, after it had hardened, it looks like it should all just about fit.

Dash in place and wired in. Some tidying up required.
It looks good in place, although the visibility with the steering wheel attached is not great - the top of the wheel, for me, lines up so it obscures the middle of the dash. Not much I can really do about this. I'll fit some shift lights so I don't need to worry about watching the rev counter, and use the poor visibility of the speedo as my excuse in court.
Finally, I turned to making holes for the switches to go in, but on closer inspection, discovered that the hole saw I'd bought for this purpose requires a mandrel to attach to the drill... so that will have to wait.
The good news: apparently my exhaust should be ready for collection on Monday - looking forward to getting that fitted.
Thursday, 12 August 2010
Retirement
Being in the middle of changing jobs, I'm currently enjoying two weeks off work, which means I have lots of time for getting on with the car.
Today was spent sorting out the boot floor. This took ages, as the panels needed quite a bit of adjusting to get a good fit, and I had to make a couple of small panels out of some scrap aluminium. However, the final result is neater than I'd hoped for. There's a bit of a gap around the sides and back, but I've ordered some rubber trim to take care of this.


I also finished sorting out the cycle wing brackets. One side was straightforward, but on the other, the reinforced part of the bracket was too long, which meant that I couldn't bend it over at the point where I needed to bend it (because the reinforced bit extended to this point):


I broke out the angle grinder and the sledge hammer and soon put things right - both brackets are now the right shape.
Also finished some other odd jobs - the steering wheel is now attached to the quick-release mechanism. This was a surprising amount of hassle, but it's all together with a working horn now. Also did a bit more wiring, so the switches will light up properly now.
Today was spent sorting out the boot floor. This took ages, as the panels needed quite a bit of adjusting to get a good fit, and I had to make a couple of small panels out of some scrap aluminium. However, the final result is neater than I'd hoped for. There's a bit of a gap around the sides and back, but I've ordered some rubber trim to take care of this.

Small panel in progress.

Boot floor fitted.
I also finished sorting out the cycle wing brackets. One side was straightforward, but on the other, the reinforced part of the bracket was too long, which meant that I couldn't bend it over at the point where I needed to bend it (because the reinforced bit extended to this point):

The good side - note that the round section finishes below the cycle wing.

The bad side - round section extends up too high.
Also finished some other odd jobs - the steering wheel is now attached to the quick-release mechanism. This was a surprising amount of hassle, but it's all together with a working horn now. Also did a bit more wiring, so the switches will light up properly now.
Sunday, 8 August 2010
Panels and wiring
Emily was off rowing all day in a regatta on Saturday (winning her two races), so I got to spend all day in the garage trying to debug the wiring for the lights.


Having figured out the hazard wiring, I spent some time trying to figure out the fog/side/dipped/main beam relationship, and why the various switches didn't do what they should (e.g., main beam came on when the stalk was in the dipped position; dipped never came on; main beam only worked with sides off; etc). Peter kindly spent a long time on the phone helping me out, and we discovered a couple of mistakes in my loom (relays wired up wrong) which got us 90% of the way there. After some more poking around on my own with a multi-meter, I figured out which wires were in the wrong place on the loom, and made some modifications. I now have fully working lighting.
I also looked into the problem of driving the oil temperature guage. Jason generously swapped his M3 dash for my 328 dash (since he's planning to use individual clocks rather than the donor dash, he wasn't fussed about keeping the M3 one), which means that I get an oil temperature guage in place of an MPG readout - much more relevant for this car. On the other hand, the 328 engine doesn't have a sensor for oil temperature, so I had to improvise. The normal place to add it is in place of the sump plug, but that would obviously mean doing a complete oil change, which I've just done - bit of a waste of new oil. Also, it's not necessarily the best place to read temperature (the M3 sensor goes into the oil filter housing). I decided to go with the M3 location, and bought a T-piece off Ebay:

Badly designed T-piece
It looks good, but sadly despite being designed for exactly this application, the threads are the wrong size, the holes are not deep enough, and the plugs won't physically fit in the space available. A bit of messing around with a drill and a tap has hopefully sorted it, although the depth issue might be a problem - I'm not convinced I've got a great seal on one of the senders, so there's potential for a leak here. Hopefully the threadlock will form a good seal. I ground the plugs right back and soldered the senders directly onto the engine loom to get around the space issue; let's hope they don't break too often. I kind of wish I'd spent the £50 and got an M3 oil filter housing, which would have avoided all this hassle.
Today was mostly spent sorting interior panels. The centre tunnel is now fully covered, and I've made a start on the boot. The panel is not a good fit (there's a 10-20mm gap all round the edge), so I think I may need to speak to Peter about this as I think this may be an artefact of his redesign of the rear end. The bit that goes over the fuel filler neck is also not deep enough - I can make up a new section from some aluminium sheet I have spare, but this is a bit of a pain. Cutting up aluminium panels is boring and takes ages, but at least this will be the last time.

Centre tunnel top panel going in...
Thursday, 5 August 2010
ECU shenanigans
Finally received the replacement ECU, only to find exactly the same symptoms as before.
I got my laptop hooked up to the engine, and ran a diagnosis on my new ECU, which, according to the seller, did not require an immobiliser. Unfortunately, the ECU disagrees, and says that it can't get permission from the immobiliser to start the car. How annoying.
On further investigation, it turns out that the E36 328 is a bit special in this respect. The 320, 323 and 325 all use an older Bosch ECU, which sometimes comes without an immobiliser, and can be hacked to remove the immobiliser check, if present. The M3 is a later version of my Siemens ECU, and again, can be hacked. The 328, which didn't come out until a few years later, always came with a factory immobiliser, and can't be hacked to have it removed.
So, the only option appears to be to buy a matching ECU, immobiliser and key off Ebay, figure out how to wire in the immobiliser unit, and attempt to return my replacement ECU. Given the unreliability of the seller of the original ECU, I'm not even going to bother with that one.
Very frustrating, but at least there is now a clear route to getting the engine running. Unfortunately it involves a bit of a spend on new immobiliser bits, but that can't be helped. Still looking for some of the parts on Ebay, but they shouldn't be difficult to obtain.
On the plus side: the paint people say they can probably do my car in a couple of weeks time (again, this is a bit more spendy than I was hoping, but I've seen their previous work on Will's car, and it is very good), and apparently the exhaust should be ready around end of next week.
Tuesday, 3 August 2010
More bodges (not mine)
Things started out fairly well: I hooked up the hoses and poured anti-freeze and water into the radiator. Fairly quickly, however, it became clear that there were a few leaks to contend with. A couple were just jubilee clips that I hadn't tightened enough; one was a blocked off hose that wasn't blocked enough, and, unfortunately, one came from the thermostat housing.
As the car doesn't have a convenient way of draining the system without pulling off a hose, I pulled off a hose and covered myself and the garage in antifreeze. That done, I removed the thermostat housing, to discover some unpleasant things. Firstly, the previous owner, rather than spend £5 on a new thermostat, had just modified his to be always fully open. At this point, I'm not at all surprised. Fortunately, thermostats are cheap, so I bought one, and a new housing while I was at it. Secondly, the previous owner had decided to bodge up a "seal" of sorts with silicone sealant instead of a £1 gasket, hence, I assume, the leak. Thirdly, and most annoyingly, he'd clearly not bothered with a torque wrench (well, it would be surprising if he had, given the other bodges), and had torqued up one of the bolts on the engine lifting bracket (which had to be removed for access) so tightly that on removal, the thread from the engine remained attached to the bolt I removed. I could enlarge the hole and re-tap it, I suppose, but it's not really important (at least until I want to remove the engine), so I've left it alone for now.
I replaced the gasket, reattached things, and all is now leak-free.

Rich popped over and we had a look at mounting the seats and harnesses. No big issues here, although a bit of care needed to make sure all the holes lined up, which, in the end, they did. Seats are in and look good with the harnesses.

I also took a look at the throttle pedal. Ignoring for now the issue of mounting it (the captive bolt it pivots on is too short, so I've had to grind the nut down from 10mm or so depth to about 2mm - hope IVA don't mind / notice), the return is a bit feeble, so I attached an additional spring. It seems a little more positive now, although possibly a stiffer spring wouldn't hurt.

As the car doesn't have a convenient way of draining the system without pulling off a hose, I pulled off a hose and covered myself and the garage in antifreeze. That done, I removed the thermostat housing, to discover some unpleasant things. Firstly, the previous owner, rather than spend £5 on a new thermostat, had just modified his to be always fully open. At this point, I'm not at all surprised. Fortunately, thermostats are cheap, so I bought one, and a new housing while I was at it. Secondly, the previous owner had decided to bodge up a "seal" of sorts with silicone sealant instead of a £1 gasket, hence, I assume, the leak. Thirdly, and most annoyingly, he'd clearly not bothered with a torque wrench (well, it would be surprising if he had, given the other bodges), and had torqued up one of the bolts on the engine lifting bracket (which had to be removed for access) so tightly that on removal, the thread from the engine remained attached to the bolt I removed. I could enlarge the hole and re-tap it, I suppose, but it's not really important (at least until I want to remove the engine), so I've left it alone for now.
I replaced the gasket, reattached things, and all is now leak-free.

New thermostat housing.
Rich popped over and we had a look at mounting the seats and harnesses. No big issues here, although a bit of care needed to make sure all the holes lined up, which, in the end, they did. Seats are in and look good with the harnesses.

Seats and harnesses done.
I also took a look at the throttle pedal. Ignoring for now the issue of mounting it (the captive bolt it pivots on is too short, so I've had to grind the nut down from 10mm or so depth to about 2mm - hope IVA don't mind / notice), the return is a bit feeble, so I attached an additional spring. It seems a little more positive now, although possibly a stiffer spring wouldn't hurt.

Additional spring on throttle pedal.
Monday, 26 July 2010
Bringing shame on all Seven owners
This week's progress has mostly been a mixture of sorting out interior panels, attempting to start the engine, and shaming all real Seven owners.
Firstly, the propshaft arrived and went in (actually I think this belongs in the last entry, but I forgot to mention it). Grease has been applied, bolts marked with a pen so I can see if they start to come loose, etc. I also obtained (finally) a short-shift gearstick from a Z3M and various (new) gear linkage bushes, with the result that the shift is now nice and precise, with a pretty short throw. The only downside is that to take the edge off the notchiness revealed by the short throw, I need a weighted gearstick knob. Since interior bling is the kind of thing that appeals to the more chavvy BMW owner, these tend to come with neon lights and a hefty price tag (£70 for a secondhand gear knob!), both of which I would prefer to avoid. I'm still looking for a good one.
Now that I'm done with the transmission tunnel, and don't need further access to it, I've attached the panels behind the seats and around the tunnel - although I'd drilled the rivet holes, the panels still needed some adjustment - filing off rough edges, making the fit a little better, making holes for switches, and wires, etc.

At the weekend, Nick (who formerly worked for an ECU tuning company) kindly came round and had a poke around the engine with a laptop attached. After several trips back and forth to fetch various bits, we got the laptop connected, and broke his kit car - one of the front wishbones snapped almost completely off. Fortunately it was bad enough that we noticed when we stopped, but not so bad that we crashed mid journey. Still, while it's off the road, it's probably a good excuse to drop an S2000 engine in it (it's currently got a Fiat 132 engine, which is a little lacking in poke). Shout if you need a hand with this, Nick.
The report we got out of the laptop was in German, sadly, but we managed to find the words EWS (if that's a word) and cam position sensor. We hooked up an oscilloscope to the cam sensor, and despite swapping it over for a new one, didn't get a convincing reading from either. It's not obvious what the problem is here.
The EWS is the immobiliser, which suggests that the engine seller wasn't very honest when he told me it didn't have one. This is a bit of a pain, as the ECU won't drive the coils without the presence of the immobiliser unit to which it's coded, which of course I don't have. Since most BMWs of this era (especially the more expensive models like the 328) would have had an immobiliser, I was concerned that it would be a huge pain trying to find a replacement ECU. Fortunately, I got lucky on Ebay and found an ECU from a manual 328 without immobiliser for £40 (usually they go for over £100). It's in the post.
The plan is to swap out the ECU and hope that solves the immobiliser issue. I'm not sure what the cam sensor issue is, but it shouldn't prevent engine start (I assume it will disable the VANOS dual cam system, but that's not critical).
Finally, in a move that will embarrass all proper, hardy Seven owners, I wired up the heated seats. It's against the no-frills tradition, but then again it's a car without a roof... I think they're probably a good idea. There's still a little wiring to be done, but they appear to be working.
Firstly, the propshaft arrived and went in (actually I think this belongs in the last entry, but I forgot to mention it). Grease has been applied, bolts marked with a pen so I can see if they start to come loose, etc. I also obtained (finally) a short-shift gearstick from a Z3M and various (new) gear linkage bushes, with the result that the shift is now nice and precise, with a pretty short throw. The only downside is that to take the edge off the notchiness revealed by the short throw, I need a weighted gearstick knob. Since interior bling is the kind of thing that appeals to the more chavvy BMW owner, these tend to come with neon lights and a hefty price tag (£70 for a secondhand gear knob!), both of which I would prefer to avoid. I'm still looking for a good one.
Now that I'm done with the transmission tunnel, and don't need further access to it, I've attached the panels behind the seats and around the tunnel - although I'd drilled the rivet holes, the panels still needed some adjustment - filing off rough edges, making the fit a little better, making holes for switches, and wires, etc.

Interior panels in place.
At the weekend, Nick (who formerly worked for an ECU tuning company) kindly came round and had a poke around the engine with a laptop attached. After several trips back and forth to fetch various bits, we got the laptop connected, and broke his kit car - one of the front wishbones snapped almost completely off. Fortunately it was bad enough that we noticed when we stopped, but not so bad that we crashed mid journey. Still, while it's off the road, it's probably a good excuse to drop an S2000 engine in it (it's currently got a Fiat 132 engine, which is a little lacking in poke). Shout if you need a hand with this, Nick.
The report we got out of the laptop was in German, sadly, but we managed to find the words EWS (if that's a word) and cam position sensor. We hooked up an oscilloscope to the cam sensor, and despite swapping it over for a new one, didn't get a convincing reading from either. It's not obvious what the problem is here.
The EWS is the immobiliser, which suggests that the engine seller wasn't very honest when he told me it didn't have one. This is a bit of a pain, as the ECU won't drive the coils without the presence of the immobiliser unit to which it's coded, which of course I don't have. Since most BMWs of this era (especially the more expensive models like the 328) would have had an immobiliser, I was concerned that it would be a huge pain trying to find a replacement ECU. Fortunately, I got lucky on Ebay and found an ECU from a manual 328 without immobiliser for £40 (usually they go for over £100). It's in the post.
The plan is to swap out the ECU and hope that solves the immobiliser issue. I'm not sure what the cam sensor issue is, but it shouldn't prevent engine start (I assume it will disable the VANOS dual cam system, but that's not critical).
Finally, in a move that will embarrass all proper, hardy Seven owners, I wired up the heated seats. It's against the no-frills tradition, but then again it's a car without a roof... I think they're probably a good idea. There's still a little wiring to be done, but they appear to be working.
Saturday, 17 July 2010
slow progress
Not much in the way of visible progress since the last update, except that I am now a lot more familiar with the ignition wiring.
After putting some fuel in, the car wouldn't start. Closer investigation suggested that the fuel pump wasn't running - the cheapest and most likely candidate here was the relays, so after lots of faffing about with a multimeter, I got a couple of new relays off Ebay for £10 and tried again, with the same result. The relays seemed OK, so I took the fuel pump out and had a look. One of the terminals on the pump was burned, suggesting it had been damaged in the past, so I hit up Ebay again for a new pump... which didn't solve the problem.
The pump gets voltage for two seconds as soon as the key turns, to prime it, but then nothing more (at least this shows the pump wiring is good). Similarly, there's no spark, so, it seems that the ECU is unwilling to start the engine. Likely candidates are the crank position sensor (aka CPS) and the cam position sensor, so I replaced both of these (the former was a rather unpleasant £70). Unfortunately, this didn't help. The CPS is apparently responsible for reading engine revs, so it may not be a coincidence that I don't see any revs on the dash when cranking the engine - possibly the CPS wiring or mounting is dodgy. Speaking of the CPS mounting, it turns out that the previous owner managed to snap off the bolt securing the CPS, then attempted (badly) to drill it out, and finally gave up and used a cable tie:

Why do it properly when a cable tie will just about do?
After a long conversation with the international technical advisory board, one of whom is currently located somewhere in the Arctic Circle, we decided that we still suspect the CPS, with the immobiliser being the second most likely candidate (less likely because it cranks OK - I think if it had had an immobiliser, then the starter wouldn't run). More investigation tomorrow.
Fortunately, Jason provided some good news: his exhaust is ready and seems good, so mine shouldn't be long now. It looks very shiny:


Tuesday, 6 July 2010
Engine start (part 1)
Finished the wiring today and tried turning over the engine for the first time:
Everything appears to be working. It won't catch because there's no fuel, but I'll try it with the fuel tank tomorrow.
Very exciting... it's close to being a working car. If I put it in gear I can see the gearbox output shaft spinning.
Everything appears to be working. It won't catch because there's no fuel, but I'll try it with the fuel tank tomorrow.
Very exciting... it's close to being a working car. If I put it in gear I can see the gearbox output shaft spinning.
Saturday, 3 July 2010
Minor updates
Since the last post, not much has changed - not much time in the garage this weekend. However, I do have a new steering wheel, which I've trial fitted (it will need to come off for IVA). It's 320mm (the same as the Elise), which seems about right, possibly a little big. I'll see how it goes.

The main progress has been with wiring. Emily has been busy attaching blade connectors to all the BMW plugs and wires, so the engine loom is now plugged into the main car loom. The ignition and steering column controls are not yet attached, but everything else (excluding lights, which aren't done yet) is.

The fuel filler cap has made progress this week. Last week, it was failing to line up (the filler cap protruded about 50mm from where the rear panel would go). After discussion with Peter, it sounds like my fuel tank has a longer nozzle than most, so I chopped that down, and trimmed the connecting hose to match. With that done, the filler appears to line up perfectly with the rear panel. While I was faffing around taking the fuel tank in and out, I also made some hefty brackets to stop the tank moving forwards, as it was just relying on being squeezed by some bits of chassis to stop it sliding around. I'll probably need to do the same to prevent any side-to-side movement as well.
Tonight I started trying to make a hole in the rear panel for the filler cap. This is turning out to be a massive hassle. Firstly, the adjustable hole saw that I bought specifically for this purpose turned out to be junk and fell apart after inscribing a rather imprecise circle on the panel. I went low-tech and drilled a ring of holes, then used the jigsaw to connect them. I then spent ages expanding the hole with a combination of:


New steering wheel. Shiny.
The main progress has been with wiring. Emily has been busy attaching blade connectors to all the BMW plugs and wires, so the engine loom is now plugged into the main car loom. The ignition and steering column controls are not yet attached, but everything else (excluding lights, which aren't done yet) is.

Wiring in place.
The fuel filler cap has made progress this week. Last week, it was failing to line up (the filler cap protruded about 50mm from where the rear panel would go). After discussion with Peter, it sounds like my fuel tank has a longer nozzle than most, so I chopped that down, and trimmed the connecting hose to match. With that done, the filler appears to line up perfectly with the rear panel. While I was faffing around taking the fuel tank in and out, I also made some hefty brackets to stop the tank moving forwards, as it was just relying on being squeezed by some bits of chassis to stop it sliding around. I'll probably need to do the same to prevent any side-to-side movement as well.
Tonight I started trying to make a hole in the rear panel for the filler cap. This is turning out to be a massive hassle. Firstly, the adjustable hole saw that I bought specifically for this purpose turned out to be junk and fell apart after inscribing a rather imprecise circle on the panel. I went low-tech and drilled a ring of holes, then used the jigsaw to connect them. I then spent ages expanding the hole with a combination of:

- Tin-snips: couldn't get enough access to enlarge the hole cleanly.
- File: very, very slow going. And very noisy - the rear panel is basically acting like a big drum.
- Dremel: slow going.
- Angle grinder: the disc was too big to fit in the hole.
- Cursing a lot: this felt more helpful than it actually was.
It's currently still about 10mm too small. To be continued...

Sunday, 27 June 2010
Bodywork and wiring
It's been another busy weekend on the car, but for once there's not much to show for it; the car looks much the same as it did on Friday. Mostly I've been doing bodywork, fettling the nosecone to fit, and drilling the last two panels. Unfortunately I received these two after I'd attached the front suspension, which is a shame, as I need to remove the suspension to get the drill in to the front part of the panel. Hence, it took me an hour tonight to drill one panel. I'm leaving the other one until tomorrow.
After making holes in the nosecone, I was able to attach the headlight bracket. This took an awful lot of measuring, adjusting, marking, offering up, etc, but on the plus side once I'd drilled it, it ended up in exactly the right place to fit the holes I'd made in the nose cone, which was not entirely expected. And with that on, we were able to trial fit the lights, which look great:


Wiring progresses slowly; the front loom is basically done, although I haven't yet attached the engine loom. After much hassle trying to fit the engine loom in front of the battery, I eventually chopped off the big plastic box containing all the wires, and rewrapped it in electrical tape. Now it's a quarter of the size, so it fits neatly between engine and battery, giving me a nice tidy engine bay. Hopefully the wires won't melt... I might add some sort of heat shield here.

Figuring out which pin, and attaching connectors to all the wires will probably take a while. On the plus side, the quality of the GKD loom is really good, with all the plugs easy to attach and neatly labeled.
Other miscelanea: the rear panel is off again, so that it can be dropped off for painting. The tank is plumbed in, barring the filler cap which doesn't fit, although it will need to come out again to fit the rear lights. Some further fettling will be required to get the filler to attach properly. And Jason has kindly offered to swap my 328 dash for his spare M3 dash, which means that I'll get an oil temperature guage in the dash. This will be handy for track use.
I've also ordered an air filter, and started looking at steering wheel options. I'll probably go for the same size as the Elise (320mm diameter), but quick-release (for security, and getting in and out). Still looking for a Z3M gearstick (to shorten the gearstick throw).
I've noticed that the ignition barrel is a bit dodgy, and sometimes spins. Apparently this is a common fault, but basically means I might need to replace the barrel, which sounds like a huge pain. I'll leave that as plan B for now, and make sure I know how to hotwire it in case I ever get stuck, unable to start it.
Finally, I've made my mind up about engine bay cooling: there will be no bonnet scoop (I'm aiming for a very traditional looking Seven), but I am going to have small (15mm) vents at the rear of the engine bay to aid airflow:

Not very traditional looking, but I think they'll be reasonably subtle. They could be adjusted to be much bigger, anything from about 0-50mm, but this looks about right to me.
After making holes in the nosecone, I was able to attach the headlight bracket. This took an awful lot of measuring, adjusting, marking, offering up, etc, but on the plus side once I'd drilled it, it ended up in exactly the right place to fit the holes I'd made in the nose cone, which was not entirely expected. And with that on, we were able to trial fit the lights, which look great:

Emily attaches what she likes to call "an eye".

The headlights in place.
Wiring progresses slowly; the front loom is basically done, although I haven't yet attached the engine loom. After much hassle trying to fit the engine loom in front of the battery, I eventually chopped off the big plastic box containing all the wires, and rewrapped it in electrical tape. Now it's a quarter of the size, so it fits neatly between engine and battery, giving me a nice tidy engine bay. Hopefully the wires won't melt... I might add some sort of heat shield here.

Wires wrapped and fitted behind the battery.
Figuring out which pin, and attaching connectors to all the wires will probably take a while. On the plus side, the quality of the GKD loom is really good, with all the plugs easy to attach and neatly labeled.
Other miscelanea: the rear panel is off again, so that it can be dropped off for painting. The tank is plumbed in, barring the filler cap which doesn't fit, although it will need to come out again to fit the rear lights. Some further fettling will be required to get the filler to attach properly. And Jason has kindly offered to swap my 328 dash for his spare M3 dash, which means that I'll get an oil temperature guage in the dash. This will be handy for track use.
I've also ordered an air filter, and started looking at steering wheel options. I'll probably go for the same size as the Elise (320mm diameter), but quick-release (for security, and getting in and out). Still looking for a Z3M gearstick (to shorten the gearstick throw).
I've noticed that the ignition barrel is a bit dodgy, and sometimes spins. Apparently this is a common fault, but basically means I might need to replace the barrel, which sounds like a huge pain. I'll leave that as plan B for now, and make sure I know how to hotwire it in case I ever get stuck, unable to start it.
Finally, I've made my mind up about engine bay cooling: there will be no bonnet scoop (I'm aiming for a very traditional looking Seven), but I am going to have small (15mm) vents at the rear of the engine bay to aid airflow:

Not very traditional looking, but I think they'll be reasonably subtle. They could be adjusted to be much bigger, anything from about 0-50mm, but this looks about right to me.
Tuesday, 15 June 2010
Brakes on at last
We went to pick up the Elise today, and while I was there, Gerald very kindly popped the wheel hub into his 36 ton press (mental note: a press capable of applying 36 tons of pressure looks like a useful thing to have around the garage; it's really a false economy not to have one), and pressed the wheel bearing in fully. Once fully seated, the play is gone, and the hub is now back on the car.
We also ground down the third set of calliper bolts, and this time, mainly through being a lot more careful, and going to the effort of trial fitting each bolt between each grinding, got the bolts to exactly the right length (this is tricky: too long and they touch the brake disc; too short and they don't visibly protrude out of the other side of the hub they bolt into, which I think is an IVA fail - you're supposed to be able to see one or two threads if forum rumours are to be believed).
Looking forward to picking up the rear banjo bolts on Saturday, which will enable me to put fluid into the brake and clutch lines, and actually have two out of three working pedals.
Monday, 14 June 2010
Starting to look like a Seven
After a few false starts, and drilling of holes in the wrong places, I finally got the radiator mounted so that the nosecone clears it properly. Here it is, looking a little more like a car:

I've also been doing research into painting methods. The current plan is to buy a compressor, then spray the panels (after wet sanding and primer). This should give a good finish, at the expense of, well, expense. Fortunately I've got a test panel, so I can make (some of) my mistakes on that before attacking the car proper.

Nose cone on... looking distinctly Seven-like.
I've also been doing research into painting methods. The current plan is to buy a compressor, then spray the panels (after wet sanding and primer). This should give a good finish, at the expense of, well, expense. Fortunately I've got a test panel, so I can make (some of) my mistakes on that before attacking the car proper.
Subscribe to:
Comments (Atom)

